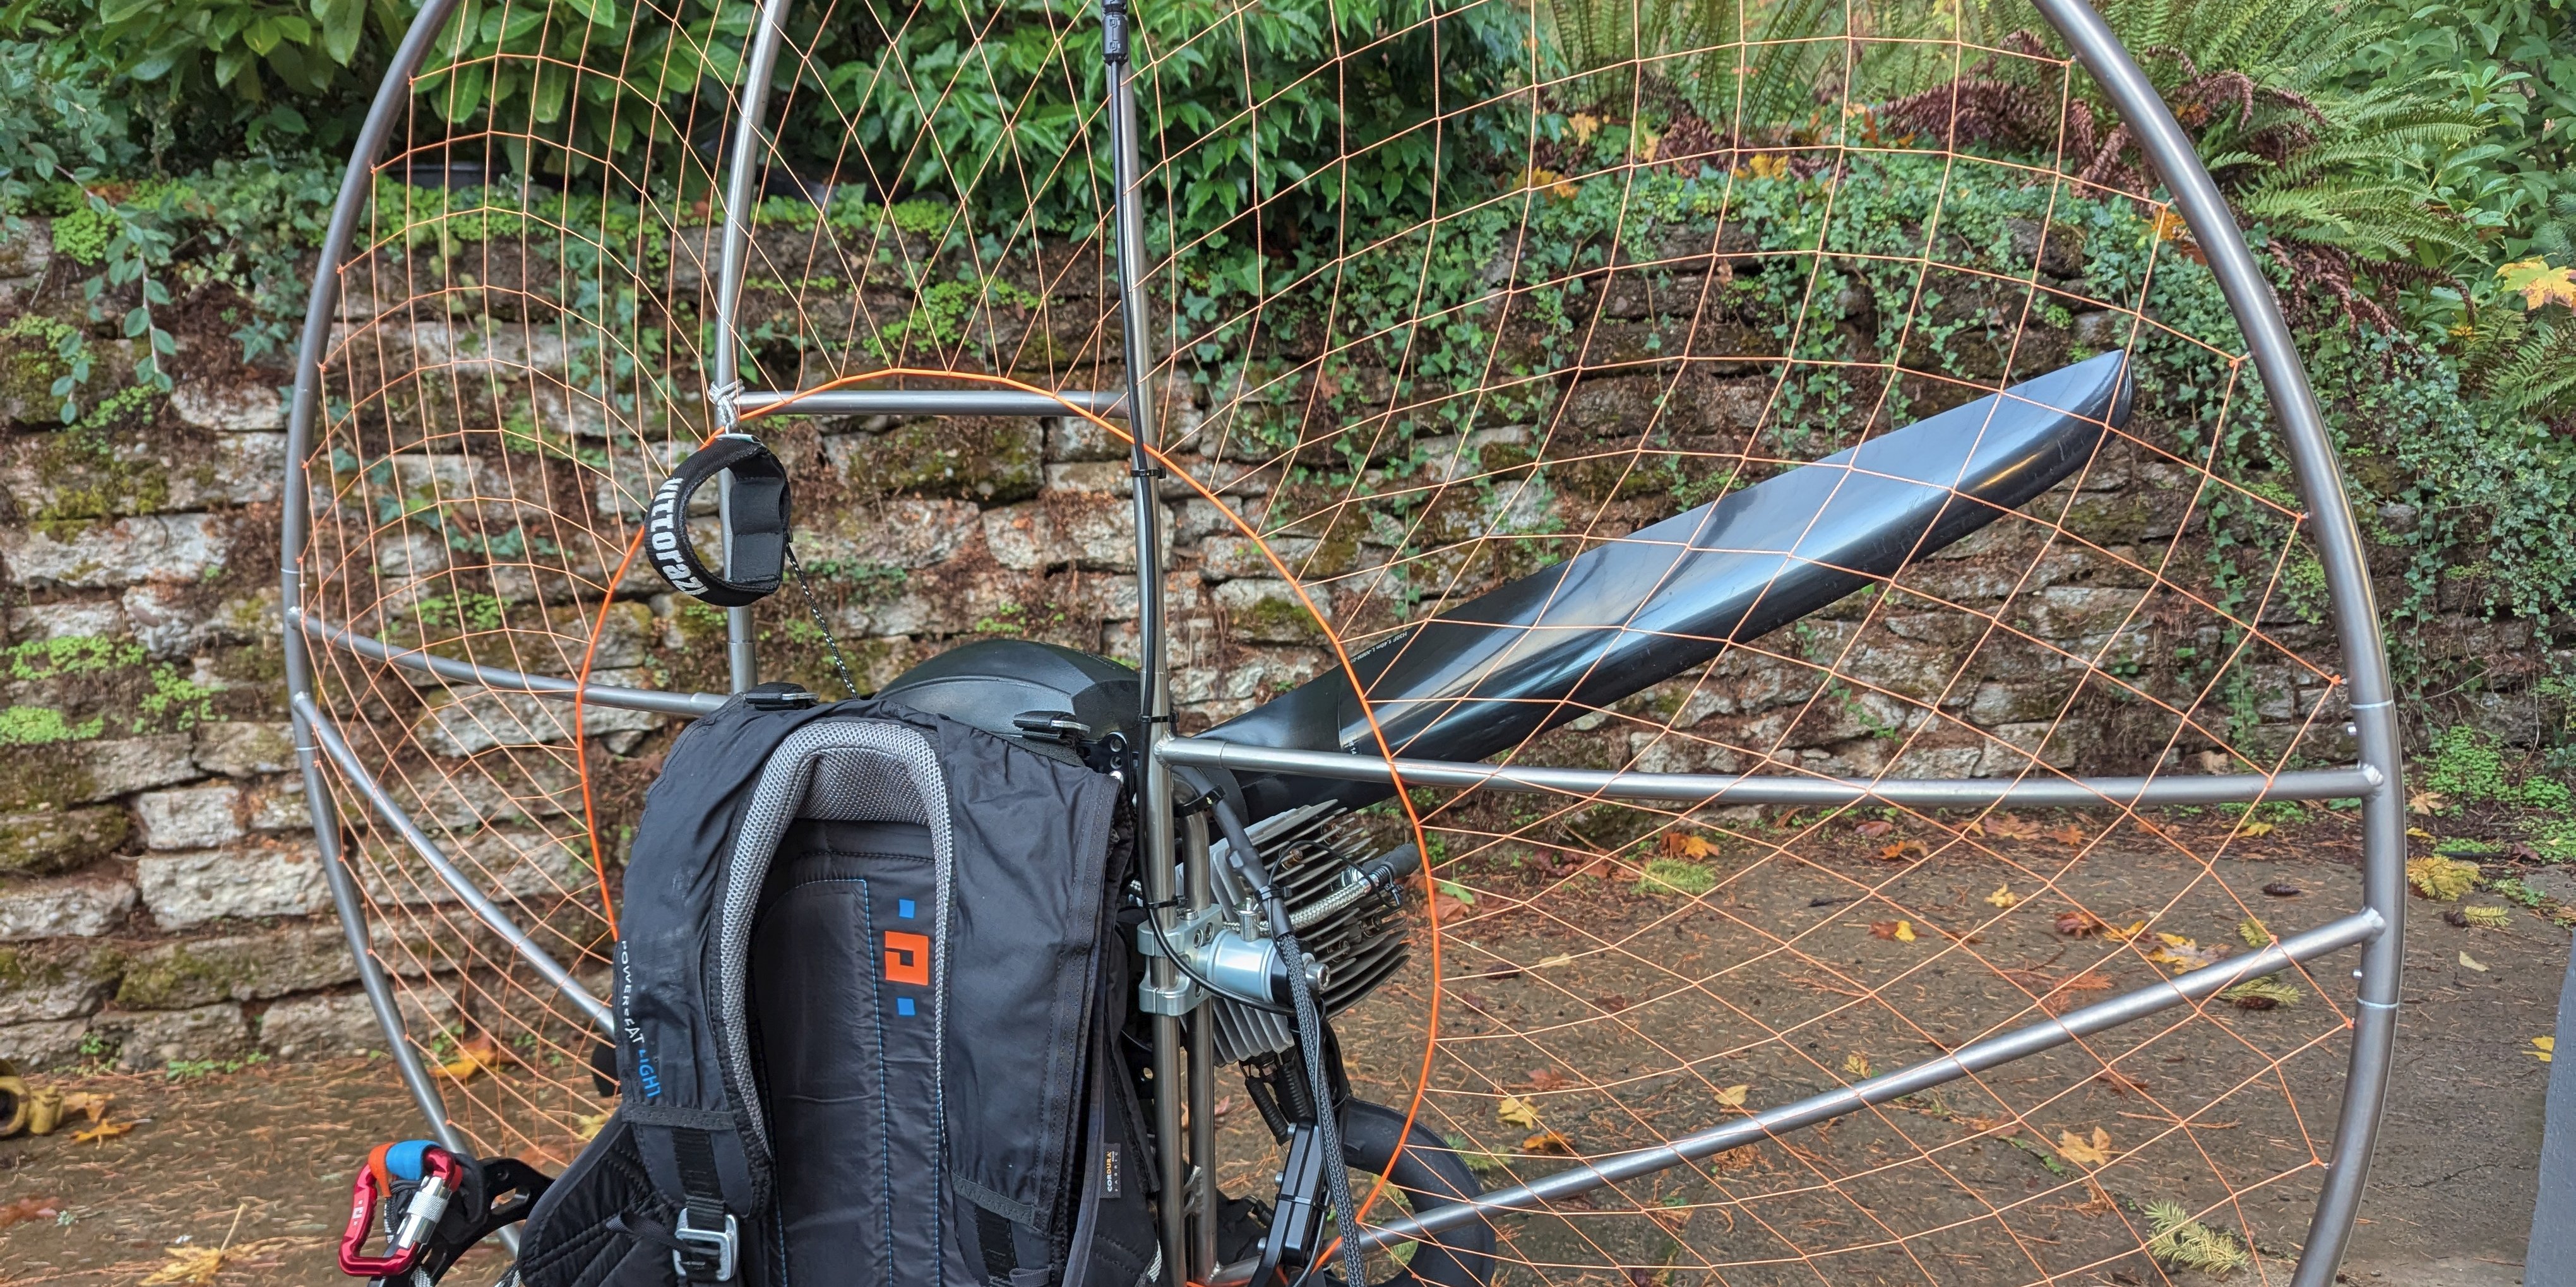
Paramotor Netting
I have a Limitless paramotor frame, and ripped the netting! To replace the netting is no big deal, $75 to Aviator Paramotor, drill out the rivets holding in the old net, and rivet in the new one.
But this was an opportunity to do thing differently! I wanted an orange net. So I had to make one.
The Limitless Paramotor Netting
The original netting is just a basic net stretched in a circle. It is a four row x 100 row net.
I am going to assume you look up how to make a net on the internet. There is no point in me rewriting the internet... just look up "netting knot" or "making a fishing net".
The original net appears to have been tied with a 58 mm gauge. This makes a 116 mm stretch mesh sized net (when the opening is pulled closed). This is slightly larger than the nets on my friends' Mavericks which are 100 mm nets. The Limitless has a larger hoop and the larger mesh allows the net to reach closer to the center with the same amount of openings.
Alternatively, I decided to go with a 50 mm gauge and simply add another mesh. So my net is five rows x 100 rows. By doing so my net has smaller openings, but has more of them and it turned out to be the right size.
Materials
I used generic 80 lb test braided fishing line. The diameter was about 0.50 mm. Next time I may try 100-150 lb test, or something softer, some other material, since this line was not the same as the original.
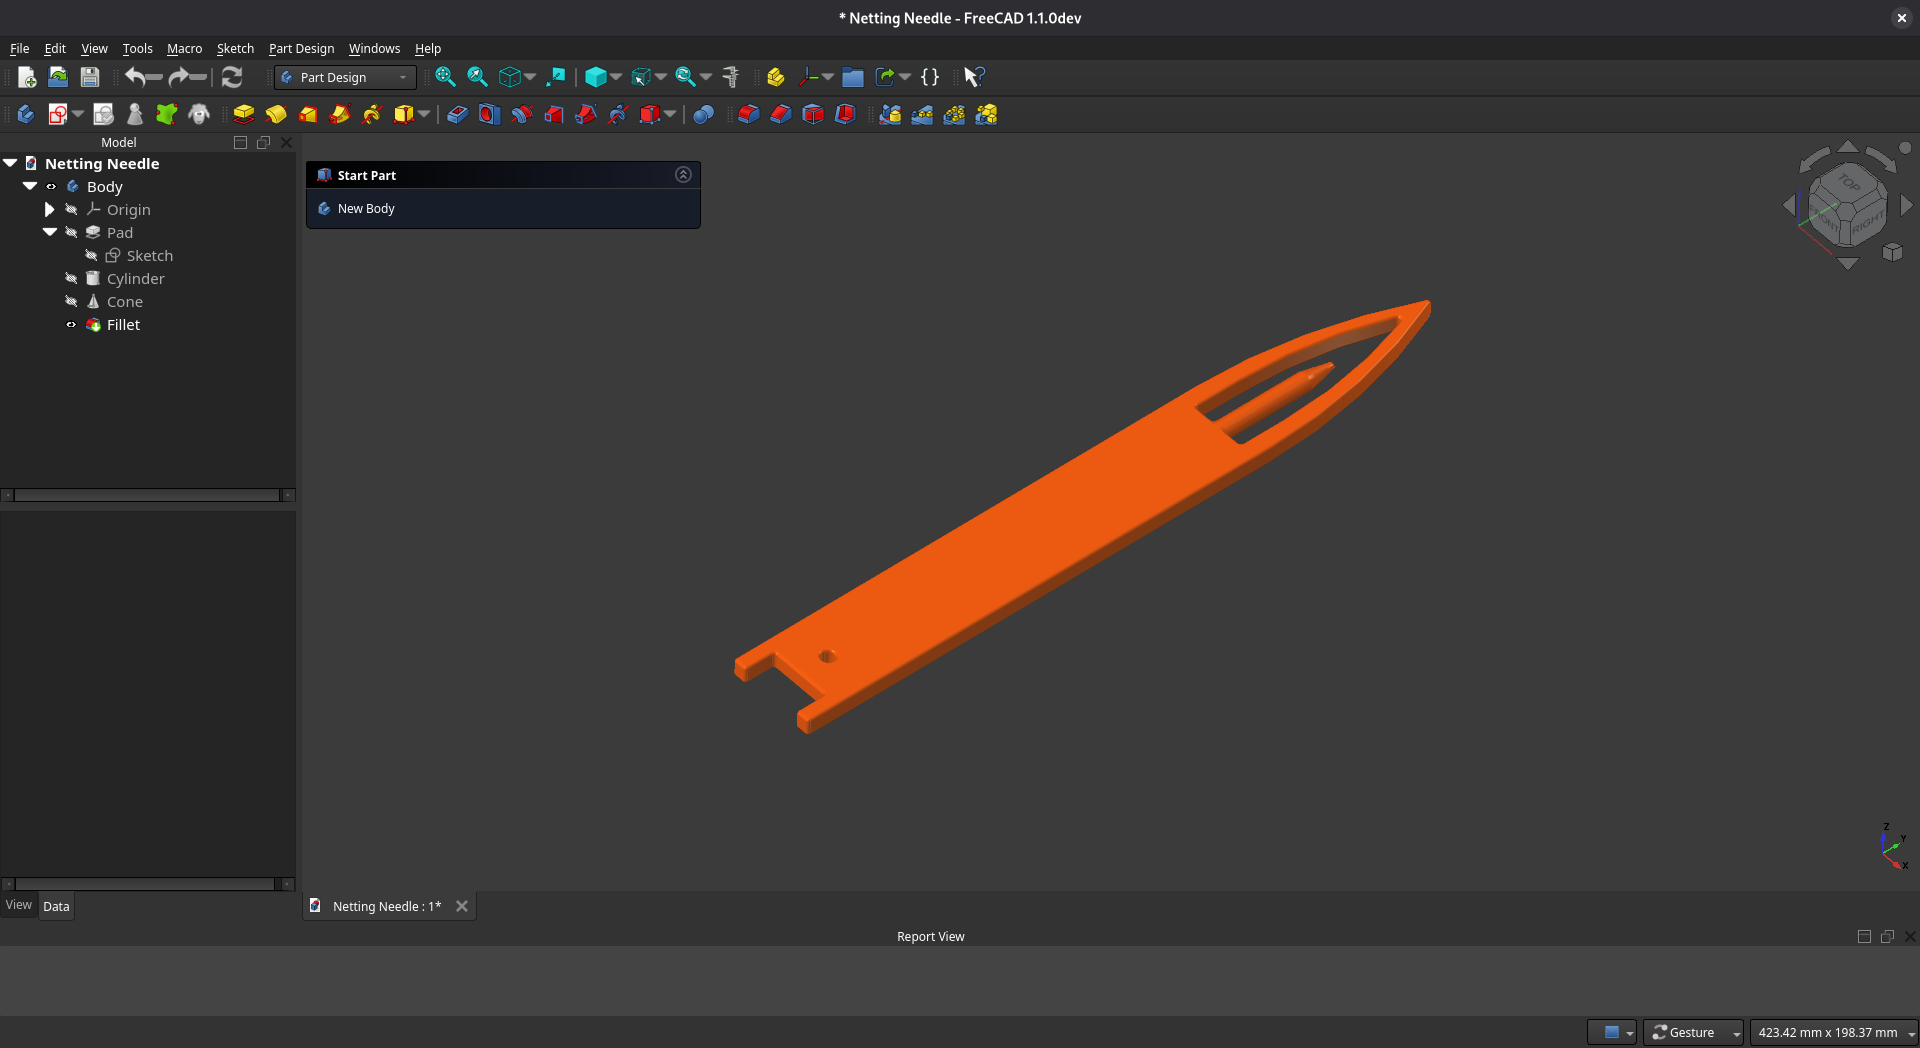
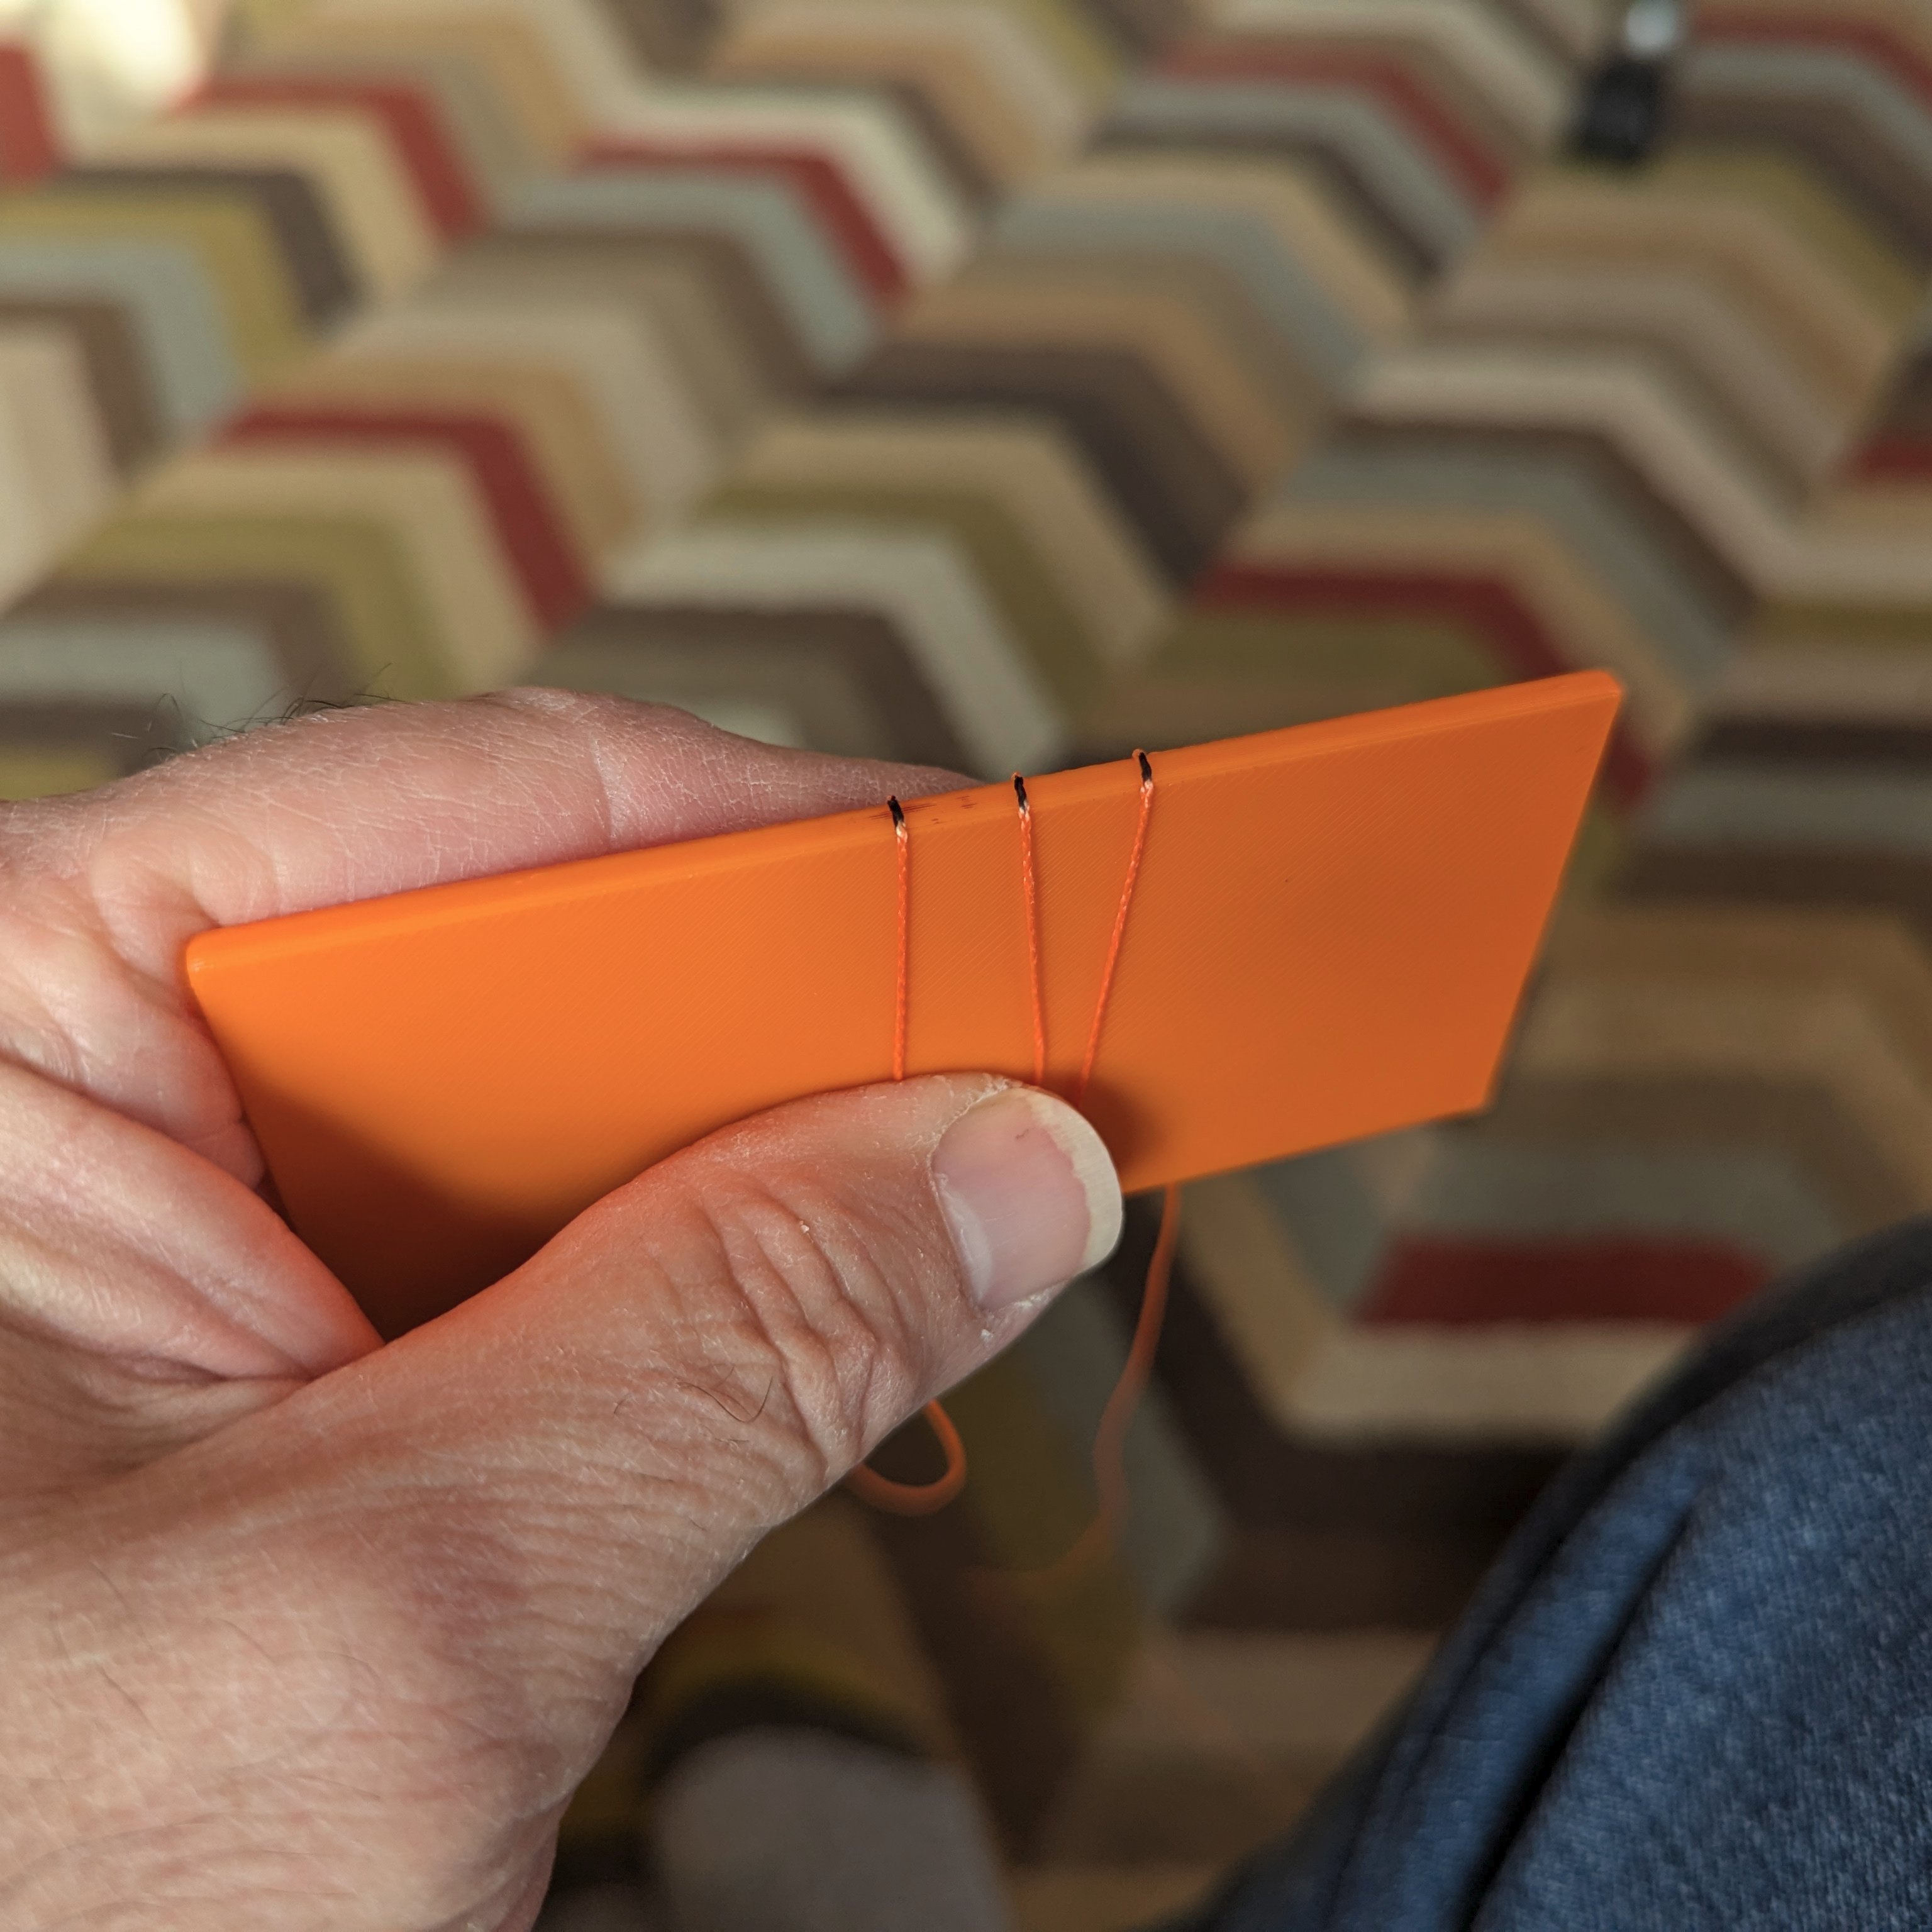
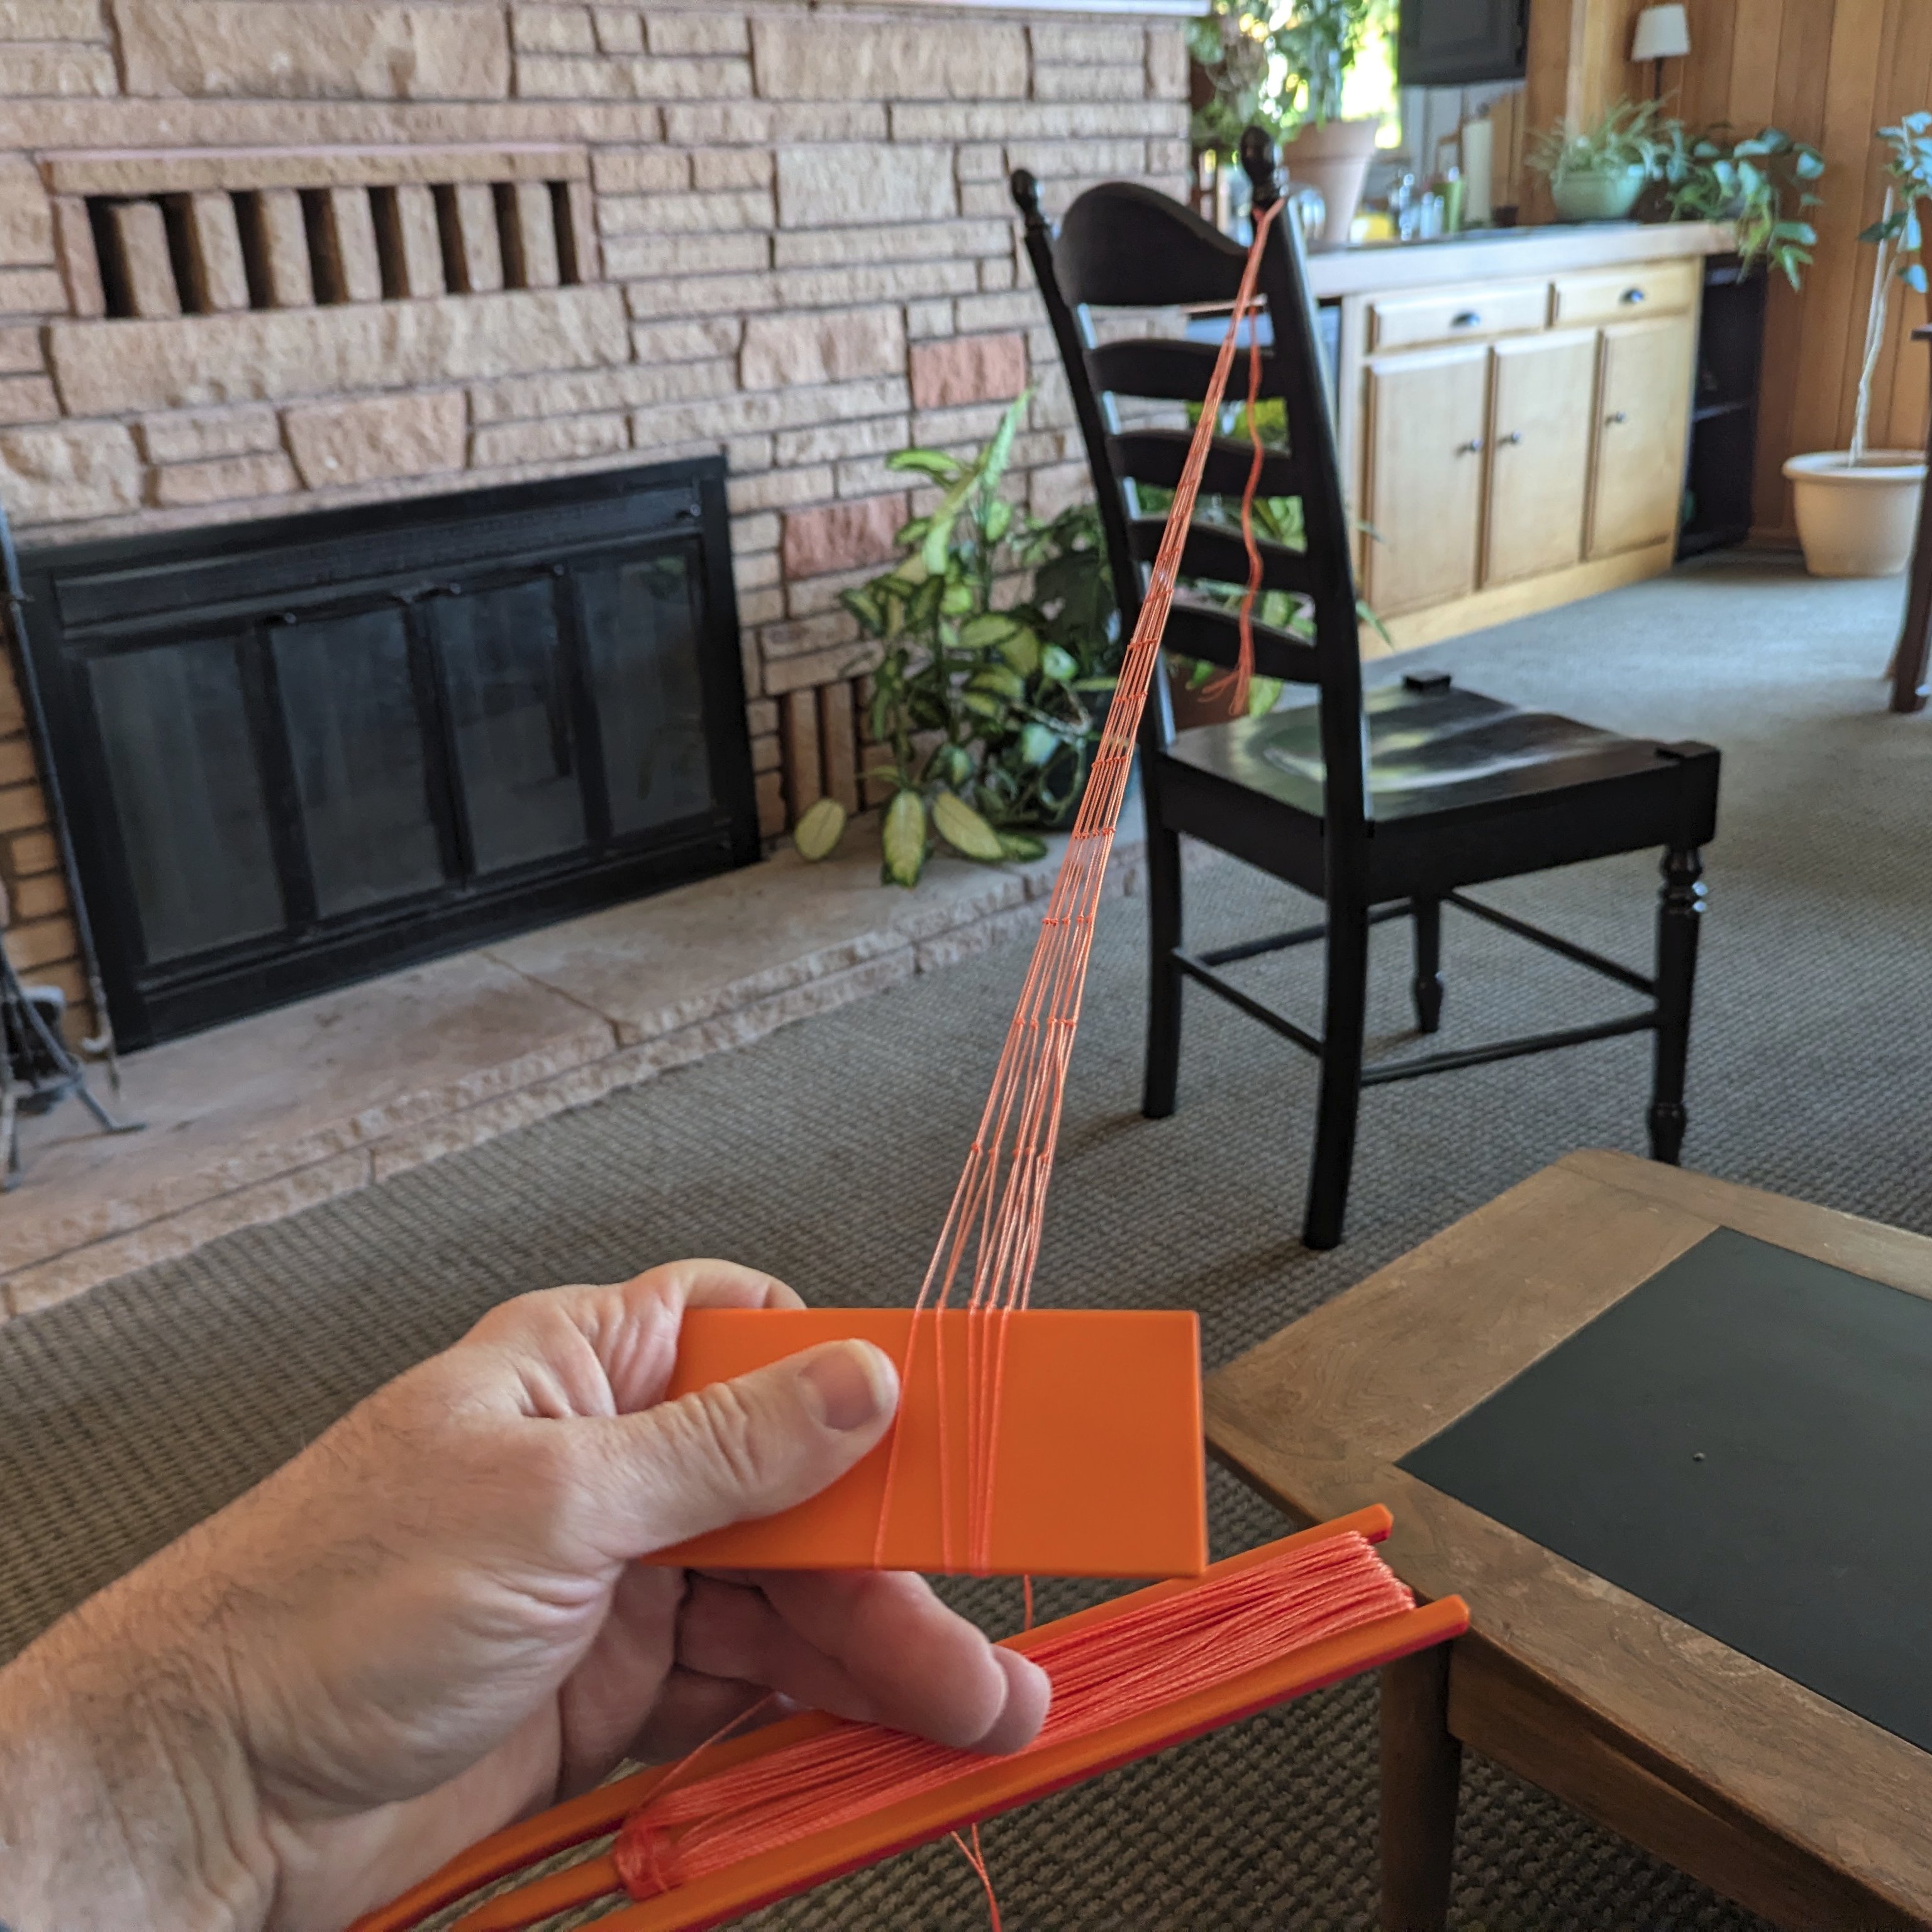
I needed a net gauge, so I 3D printed one. In the modeling software it was a 100 x 50 x 3 mm box, and then all of the edges were rounded 1 mm. I also 3D printed a netting needle, and simply make it as big as it could be and still fit diagonally on my 180 x 180 3D printer (coincidentally, this turned out to be perfect).
Getting Started
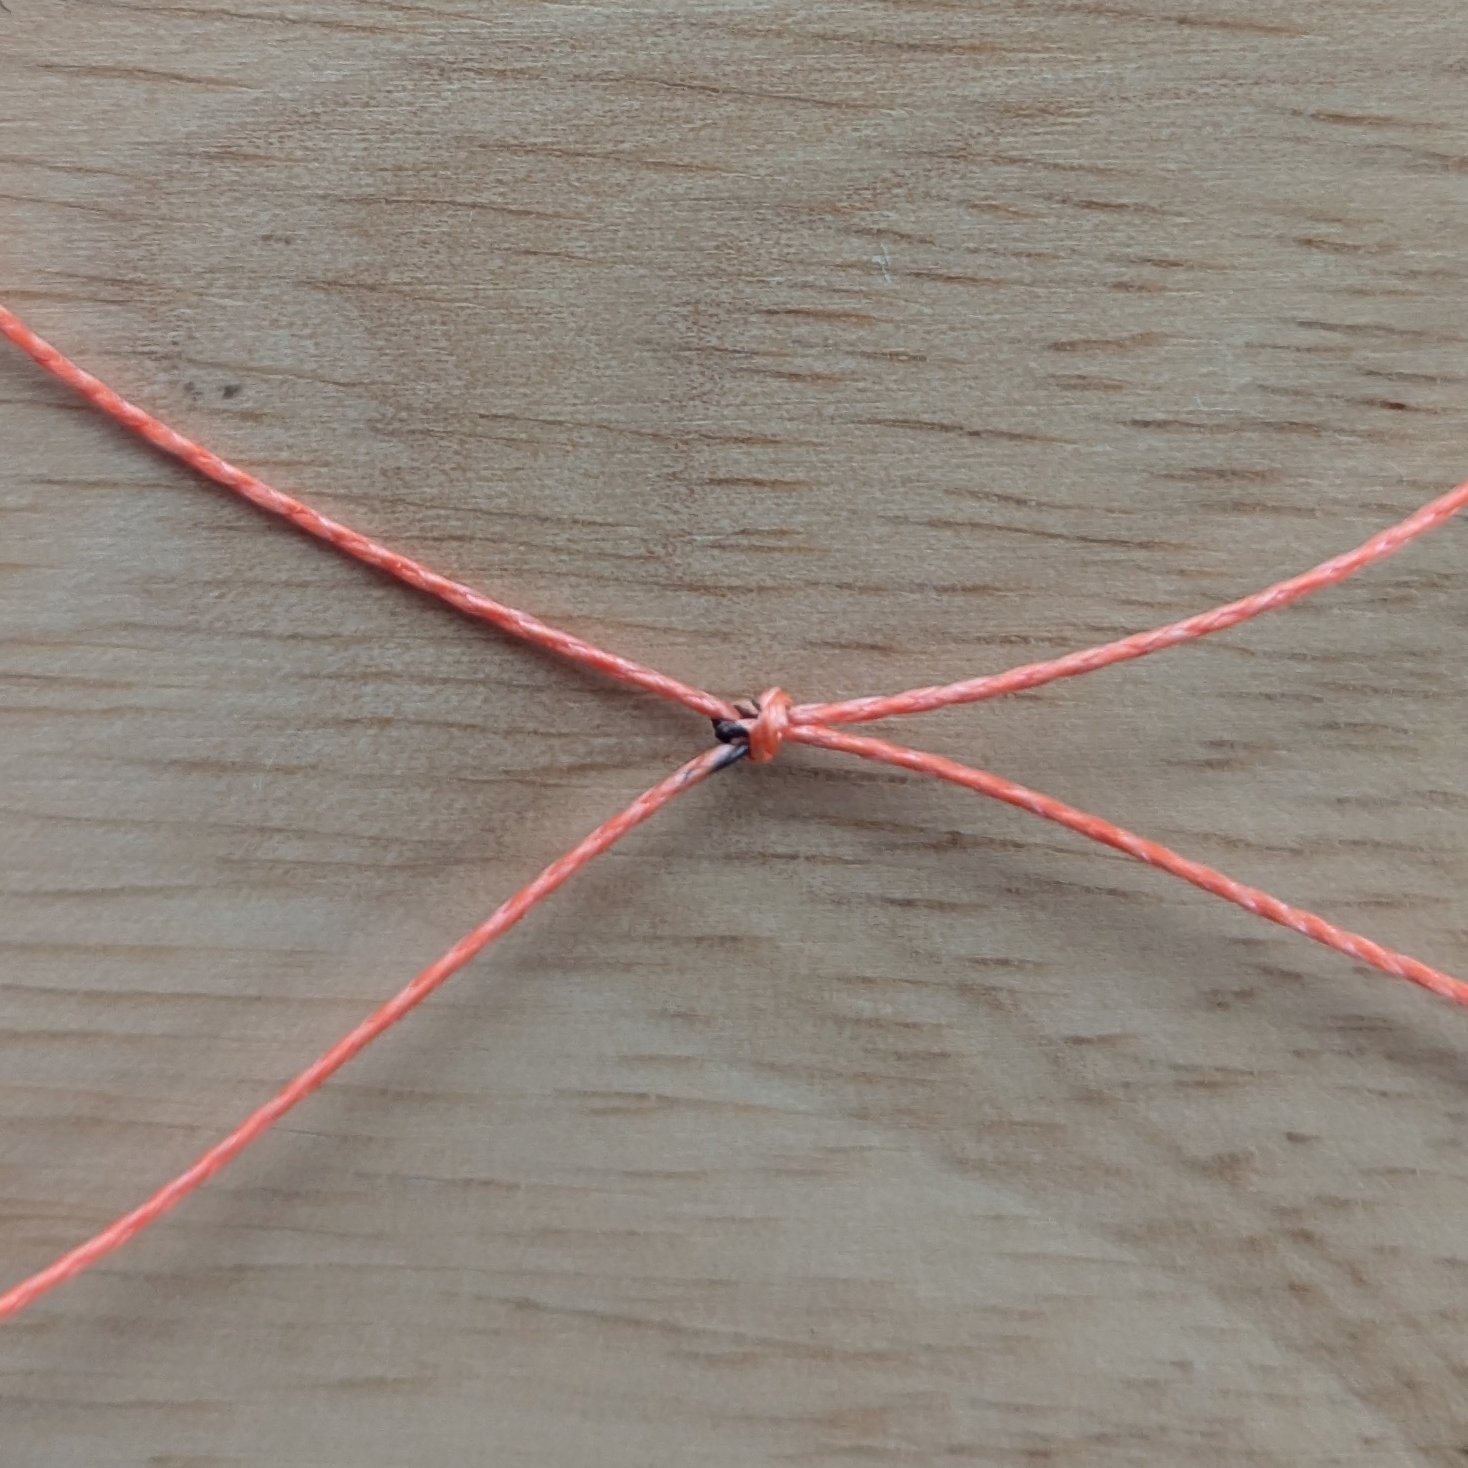
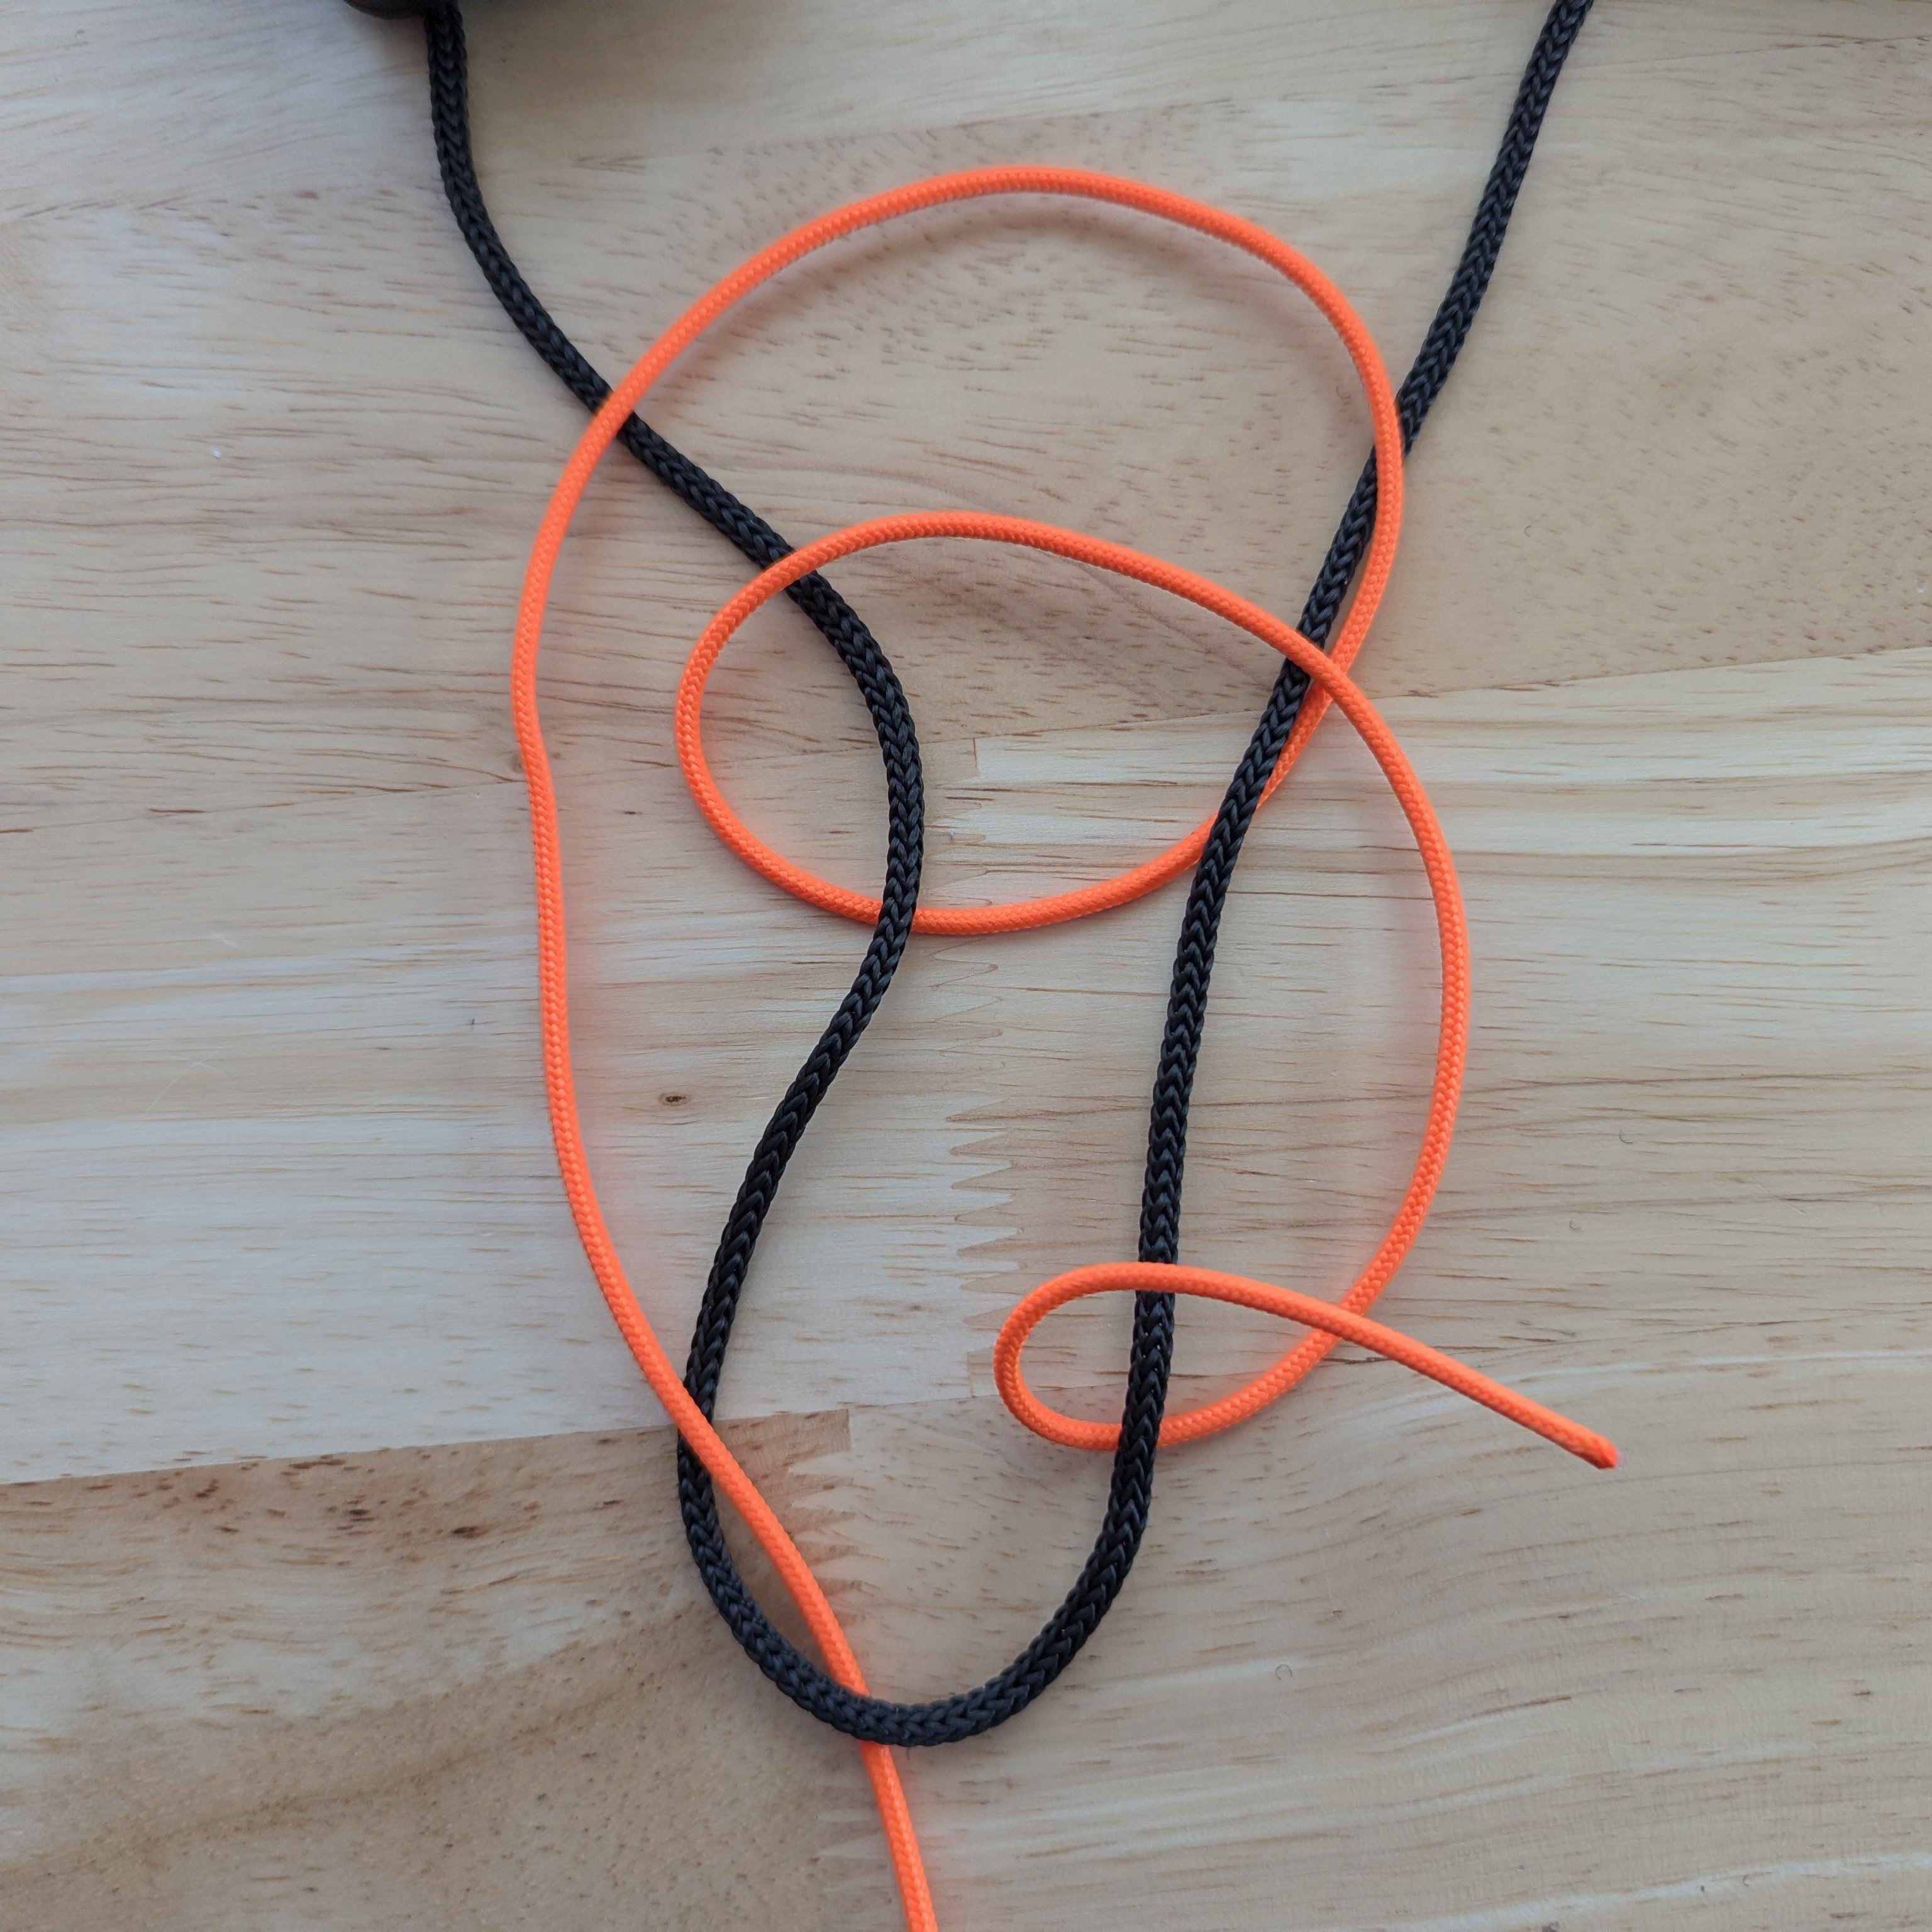
The very first loop needs to be the length of exactly two wraps around the gauge, but that is difficult to do accurately and tie a bowline knot. My trick is to wrap the line around the gauge twice, mark the line where it touches the top edge of the gauge with a marker, and then tie the knot off of the gauge with the knot finishing on the marks.
When marking the line as noted above, you actually mark three points on the line. The middle point is used to align the first netting knot.
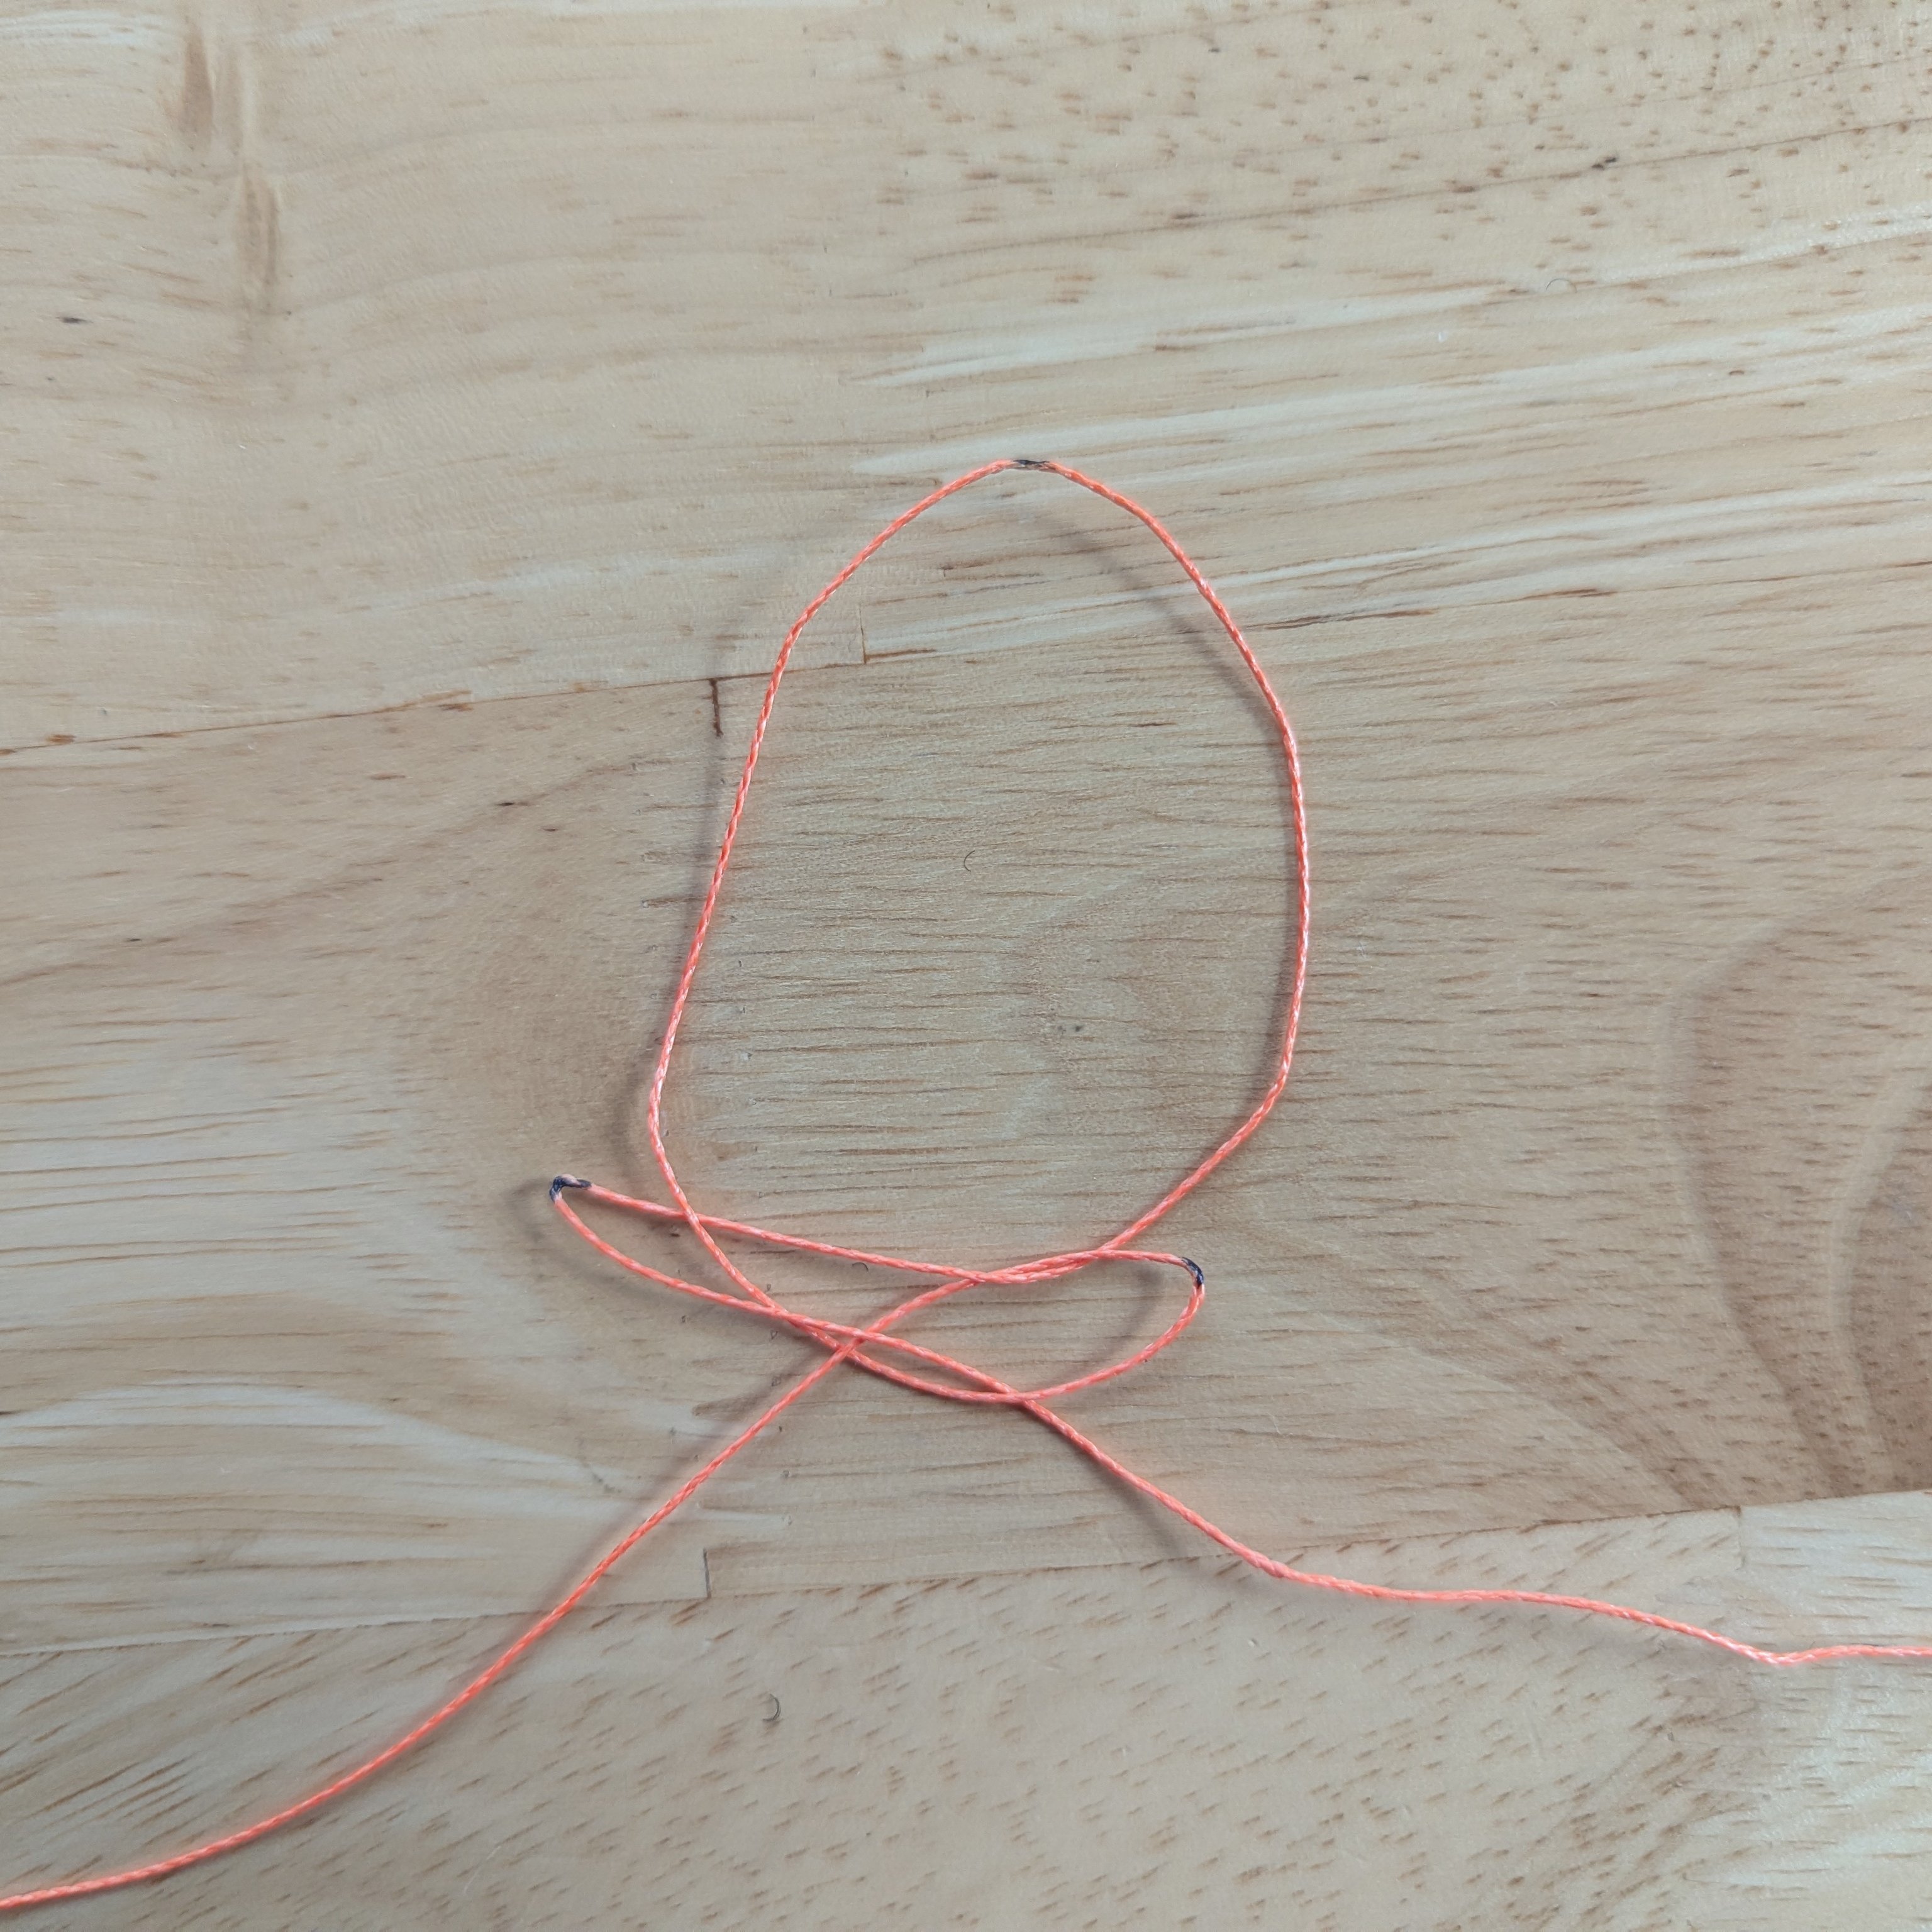
The traditional netting knot is just a sheet bend. However, a sheet bend can be made wrong if the wrap ends up in the wrong place (it is always below the joint in the online examples). Since this line is so small, it is hard to keep this from happening, so a modified sheet bend is used:
- Throw a loop of the tag end over, up, and to the left.
- Pass the tag end below from the right and around both top lines of the bend.
Normally you would tighten, making sure the loop is above the bend. This is the modification:
- Bring the tag end around again, pass it below from the right and around only the first top line of the bend.
- It should be below the wraps just made, and just above the bend.
- Now pull it tight.
This extra wrap helps keep the main wrap from falling below the bend.
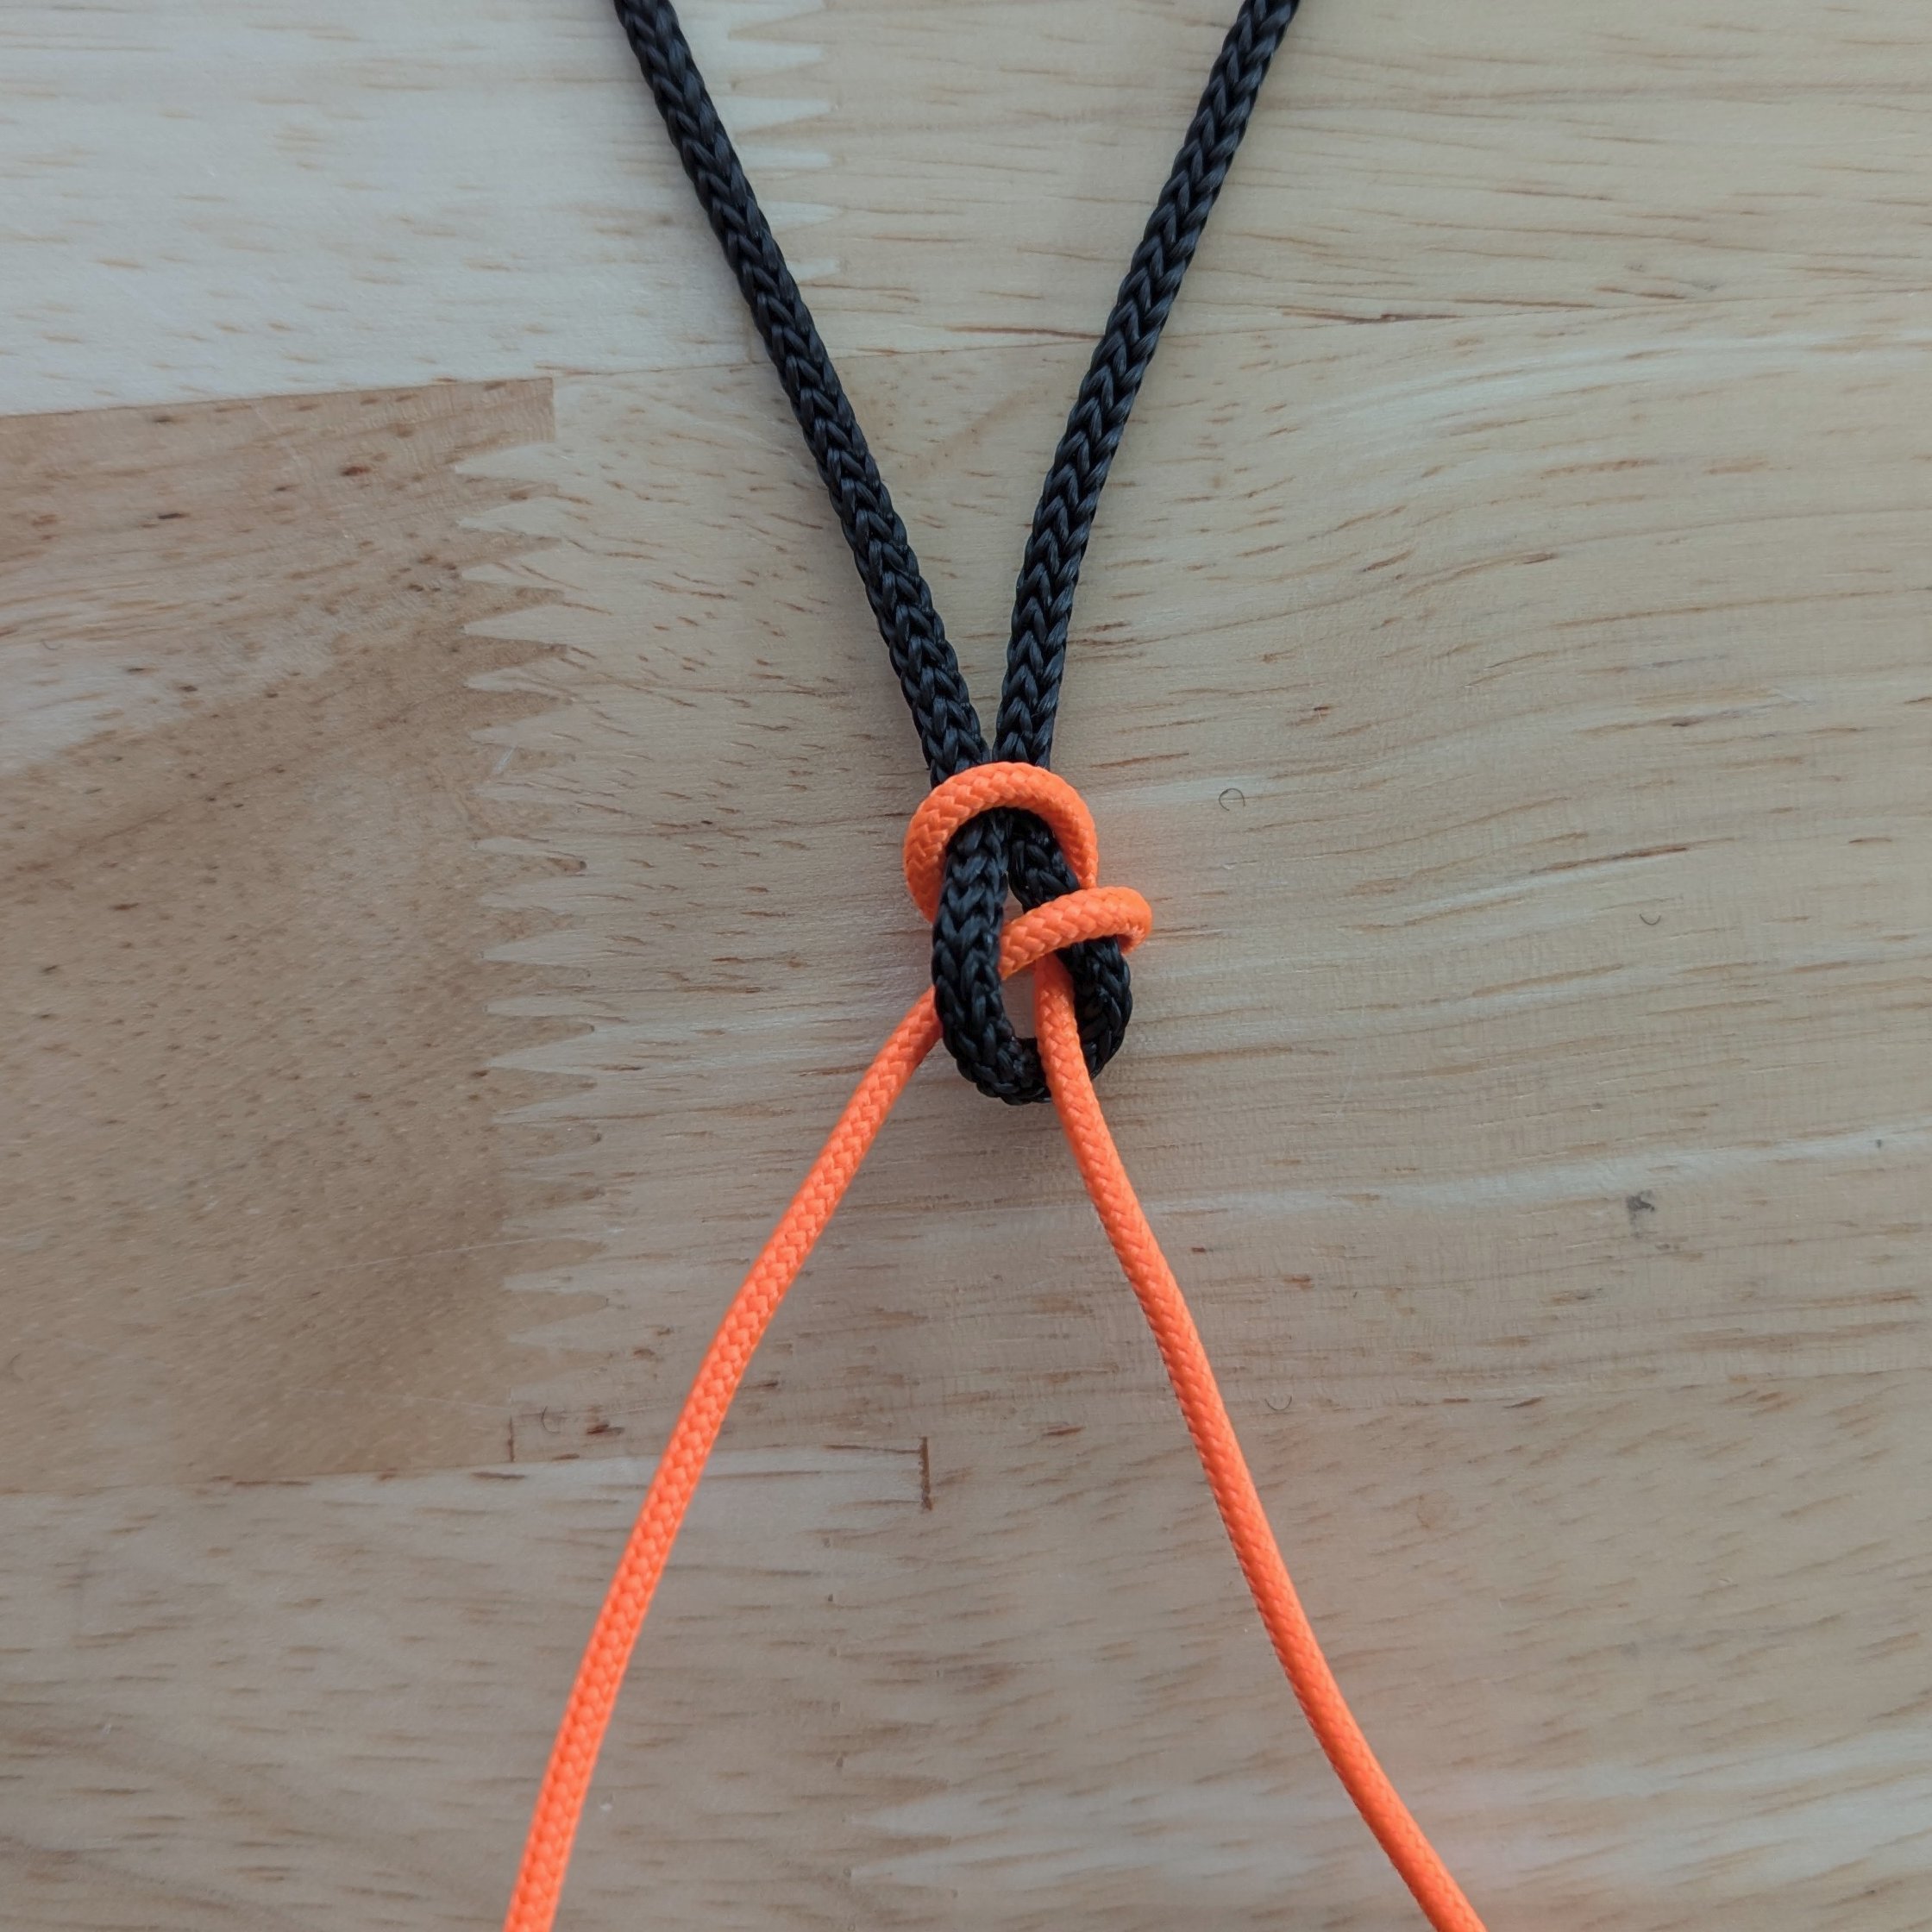
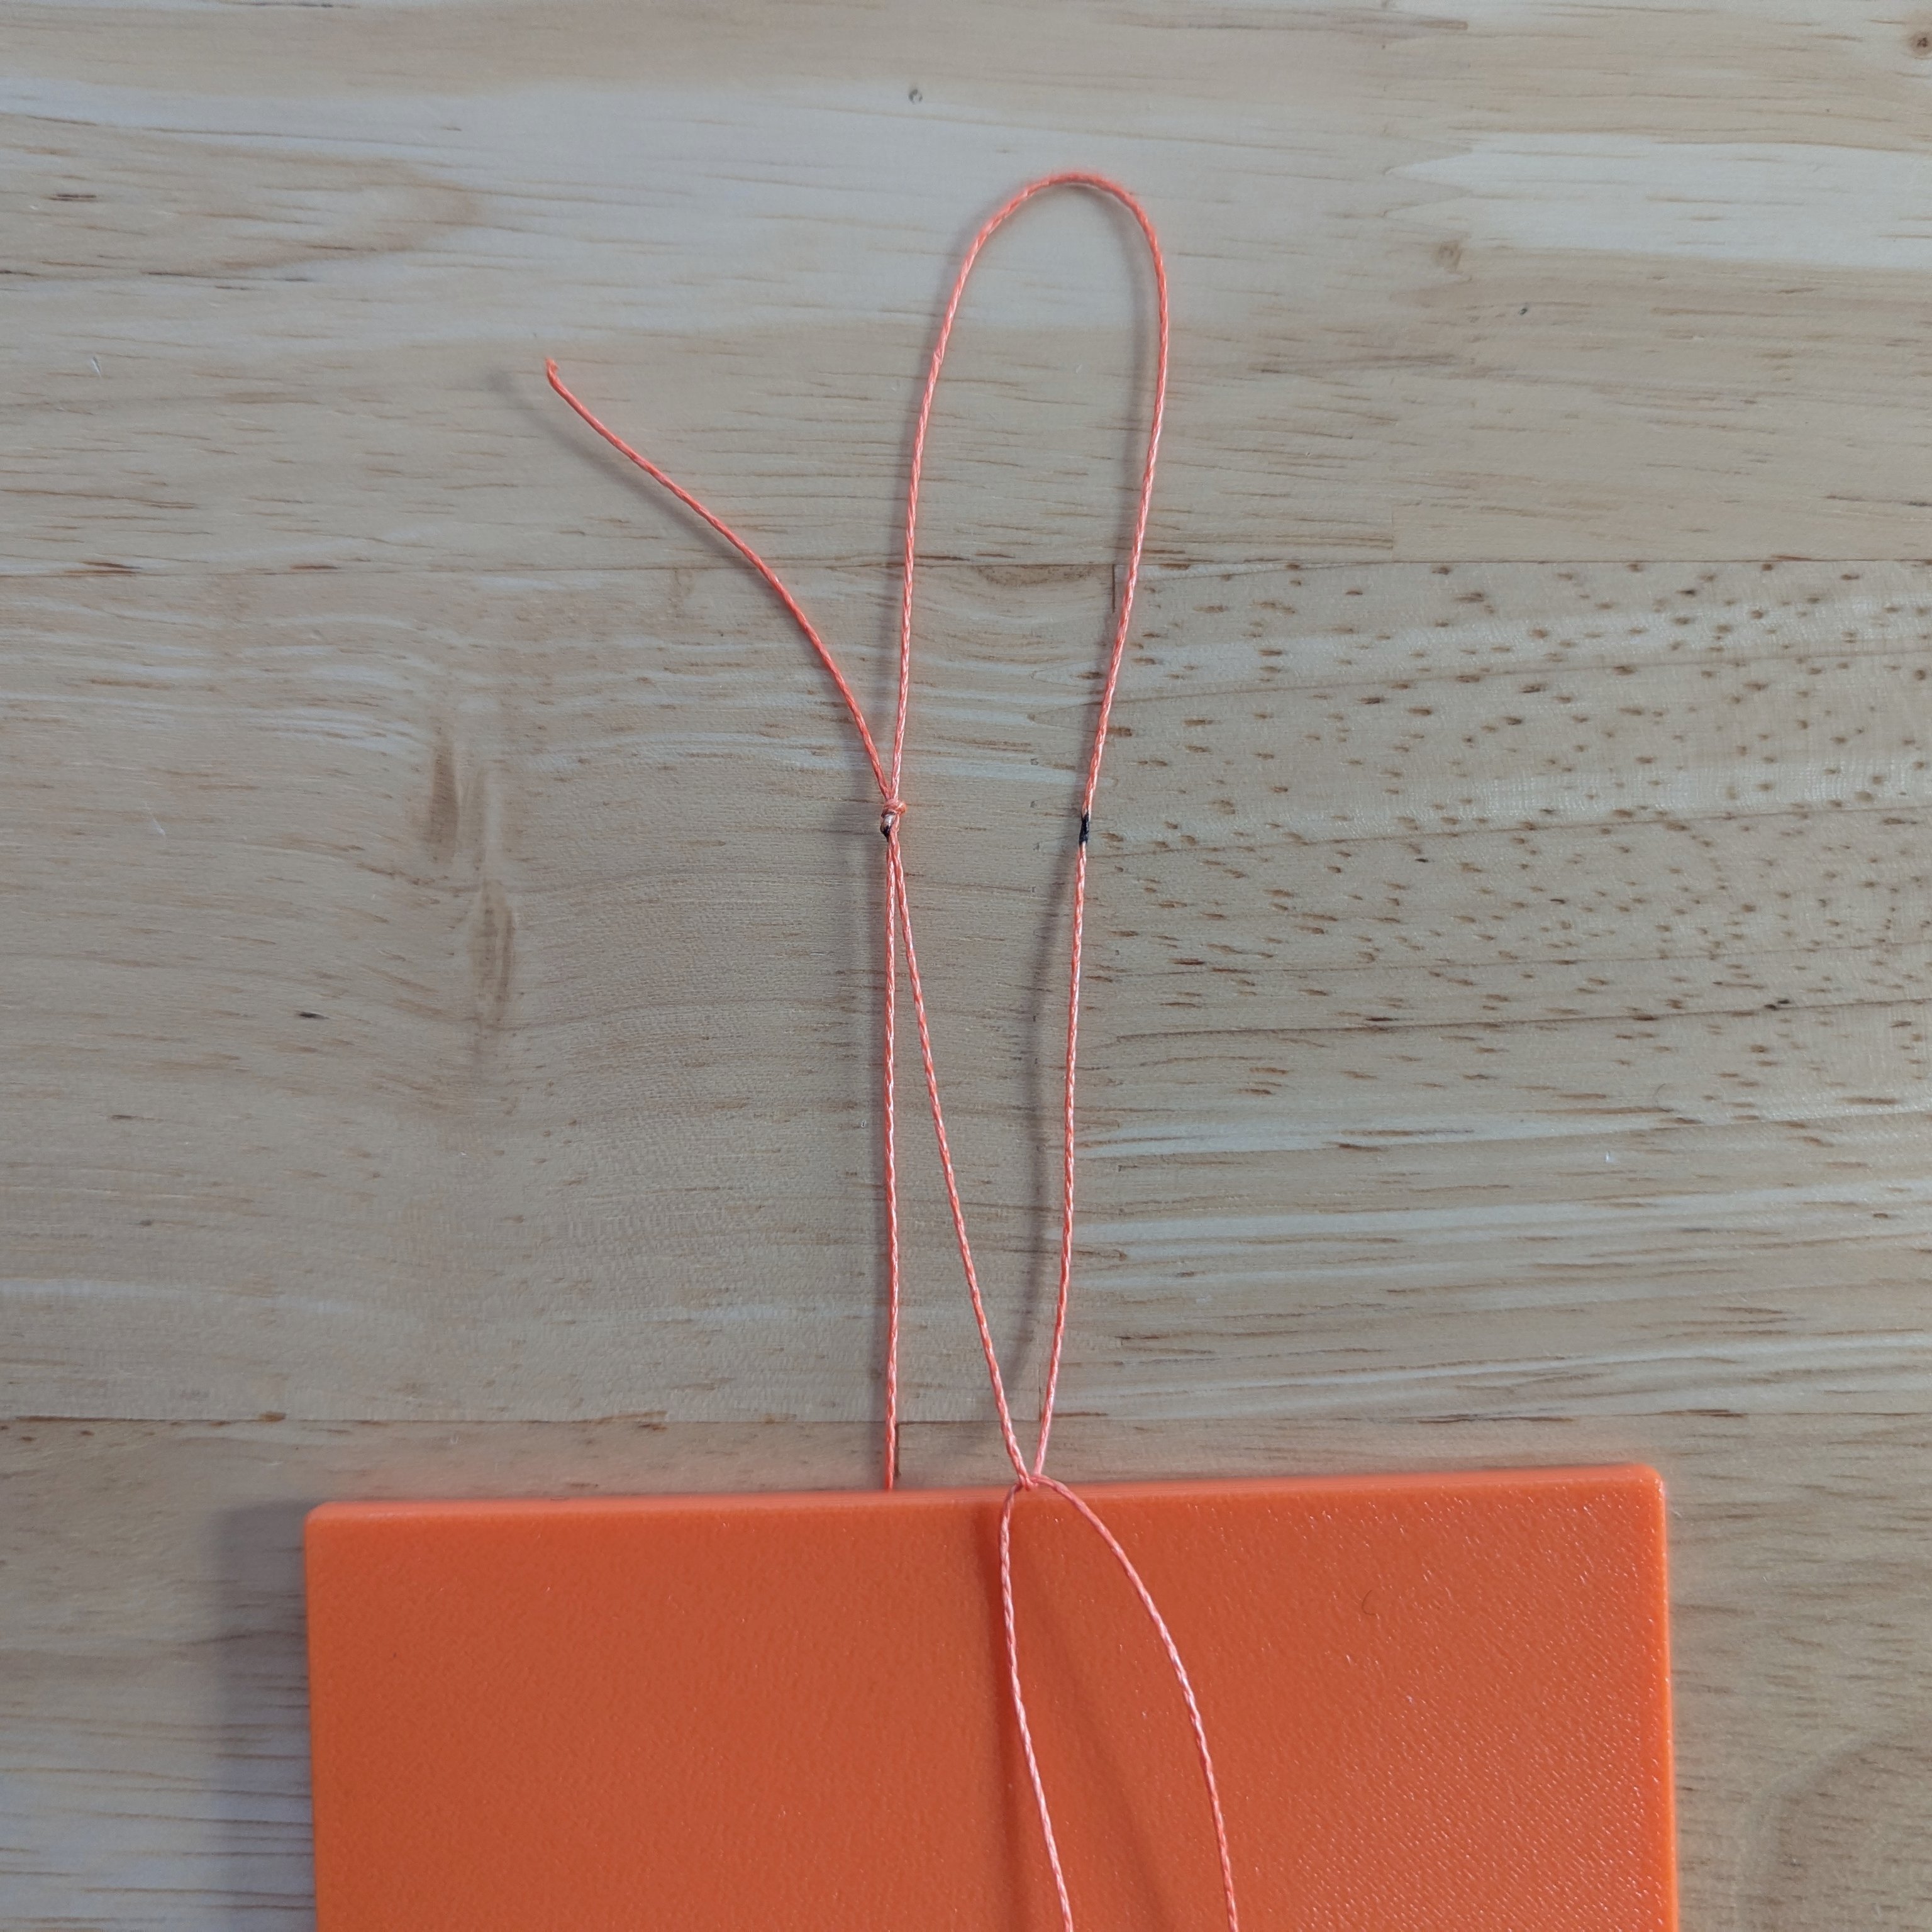
A mesh is made by passing the line around the gauge and through the adjacent opening. Then pull the line down and tight to align it. When it is aligned pinch the line tightly and do not let go until the knot is complete! You should feel the knot force its way below your thumb. This keeps the position of the knot tightly against the top of the gauge.
Because I made a five row net, there are ten knots in the starter row. Then you turn the net 90 degrees and start adding rows. To make 100 rows, you keep going back and forth until you have 100 knots in length.
Get comfortable and get going!
Installing the Netting
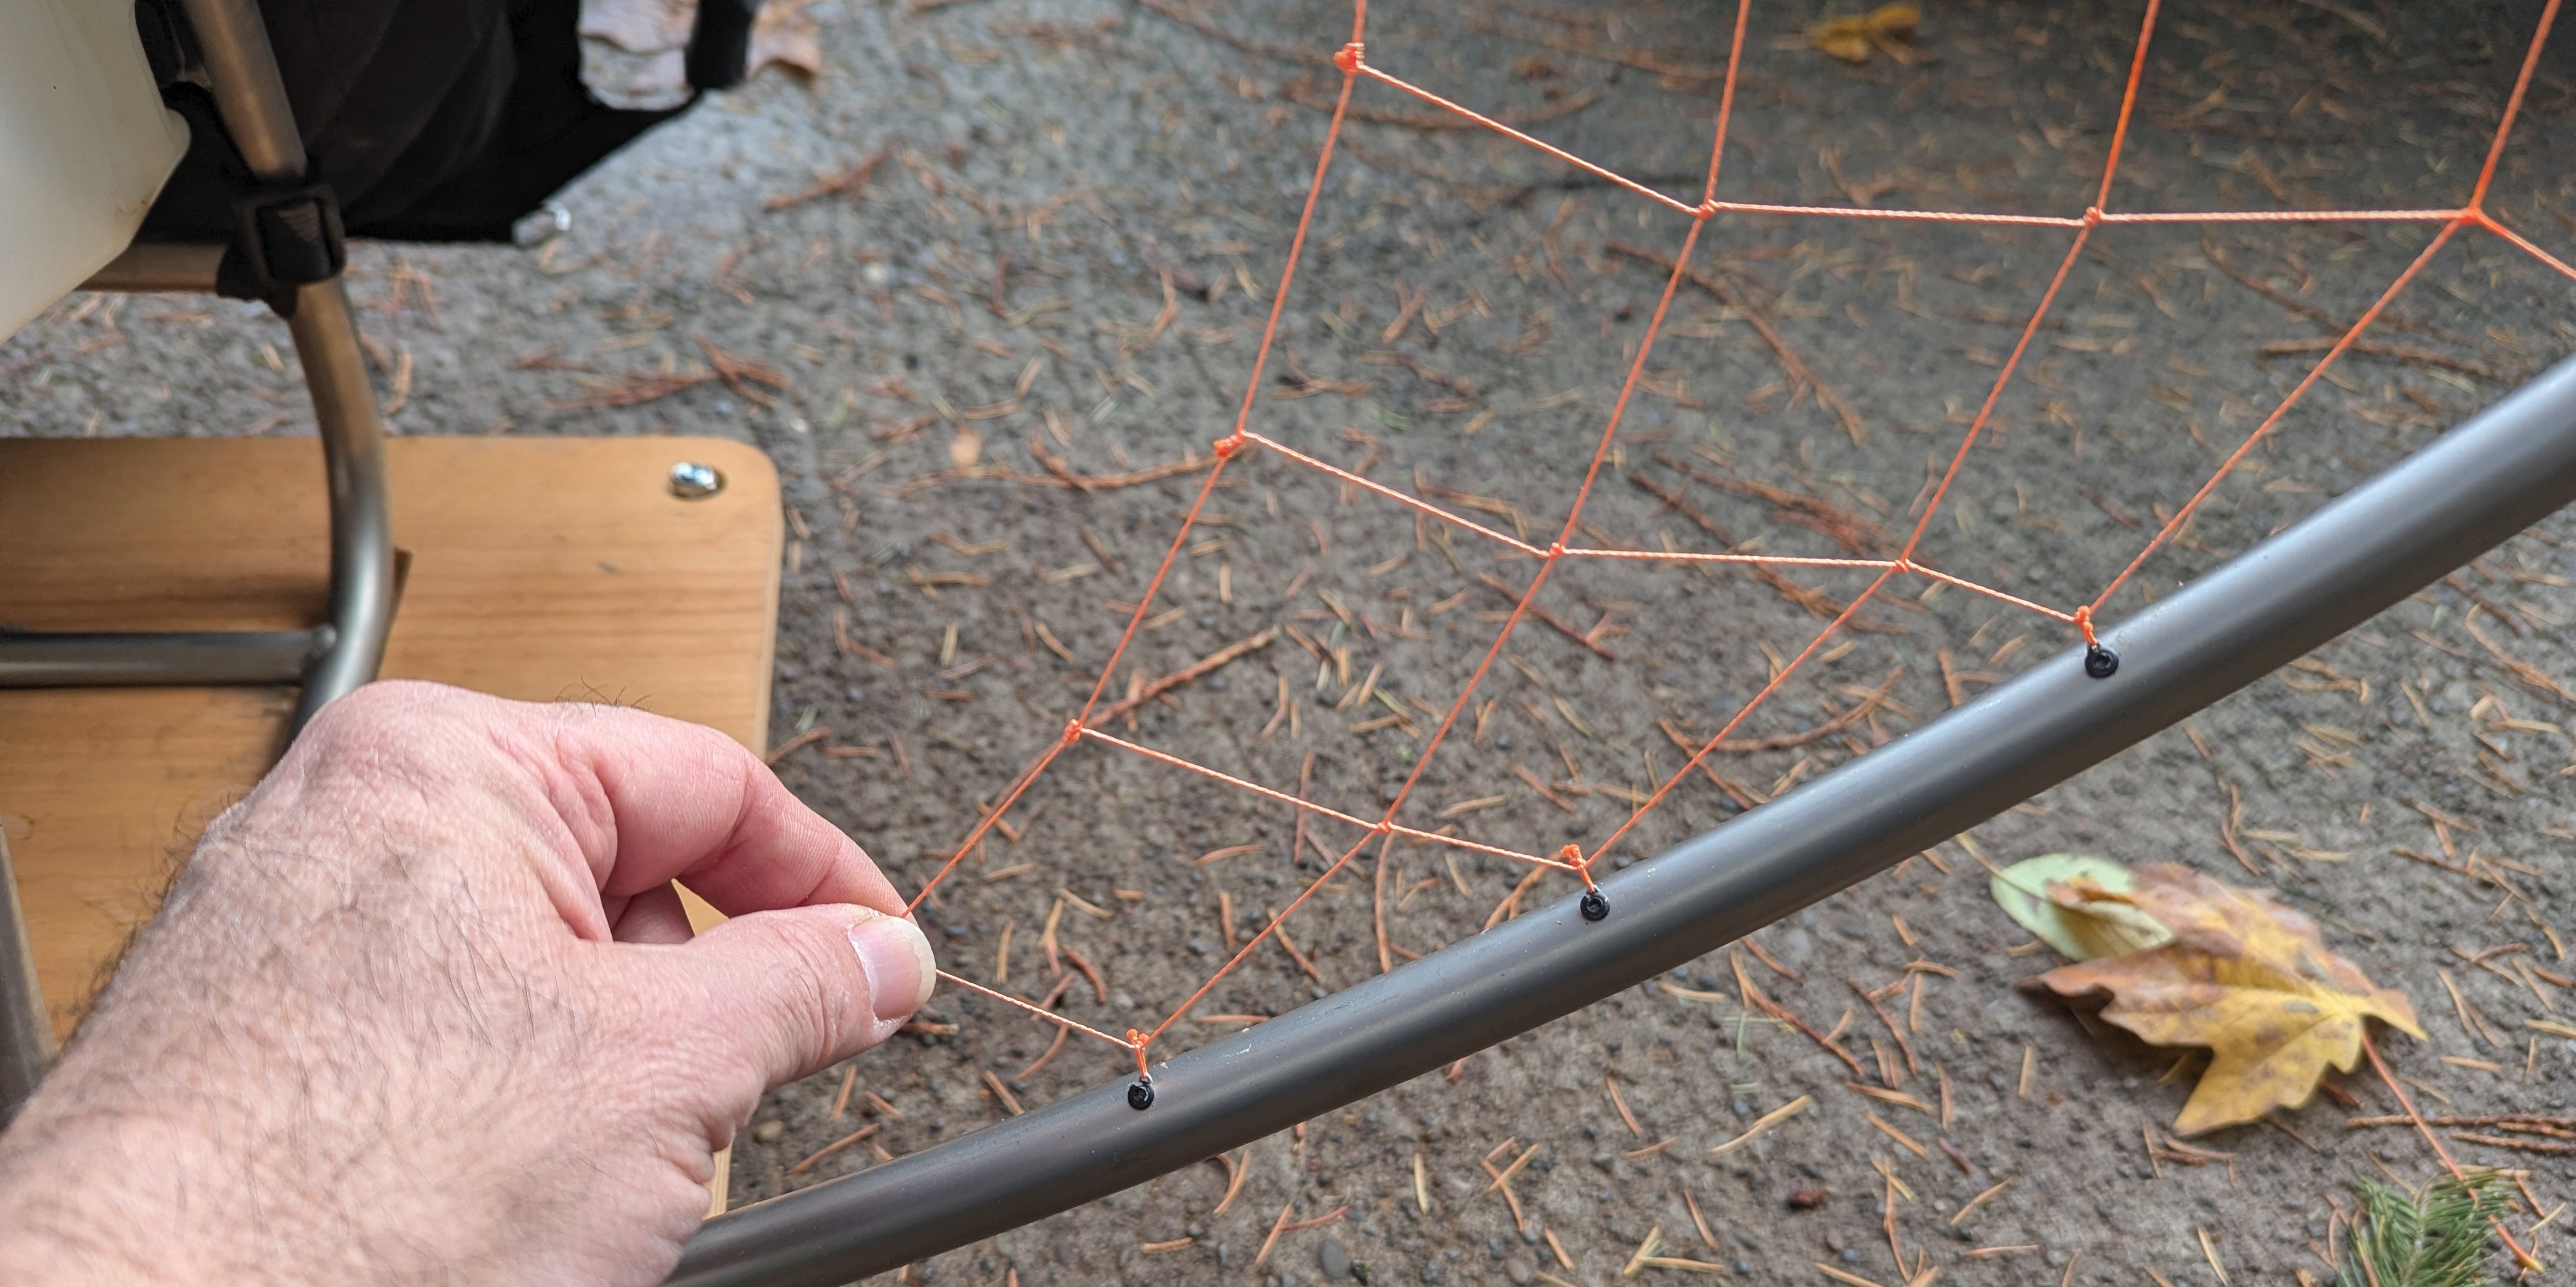
On the Limitless, the net is cut removing meshes diagonally starting at the last connection point at the bottom up to the center tension cord. The problem with this is that the connection point at the ring and the one at the cord are not in line. It creates an odd offset. The solution would be to run the tension cord through the meshes one space closer to the ring, and then they would be in line. This requires an odd net: One that has rows alternating between five and four openings. There are three ways to accomplish this:
- Start with a five row net and cut off openings. This leaves a lot of cleaning up of loose ends.
- Weave a five-four (four and a half?) style net. This requires a lot more focus and work during weaving.
- Weave a four row net, and then when finished, turn the net 90 degrees and then weave in one more pass along the long side. Perfect!
Below you can see the mesh at the bottom and that one odd spot. I am sure I could do better, but it is not worth weaving a whole new net over! If I ever do this again, I'll follow my own instructions above.
If you have questions or are interested in the 3D models, just let me know:
https://worktablecnc.us/company/ontactcay.html