
Northwest Pram - A CNC-Cut Stitch-and-Glue Plywood Sailing Pram
This is the origin story and construction log of the Northwest Pram, a small stitch-and-glue wooden sailboat built using a CNC router.
Origin
My friends all know I built a wooden sailboat with my kids several years ago. Yeah yeah yeah, they know. That build can be found here: Pooduck Skiff
Recently, I had a buddy that wanted to build a boat, had not built one before, and needed a little help. So I though this would be a fun project to completely overdo. We decided not to just build him a boat, but three. That way, he could have one, I could have one, and there would be one more to loan out to friends. We decided that the extra boat would be build first and we could use it for practice.
The Practice Boat
When we were deciding which small boat to build, we had considered a Shellback Dinghy by Joel White from the WoodenBoat Store. I had already built the larger version of the Shellback, the Pooduck Skiff. But we wanted something smaller and lighter, a one person boat. And something that was quick and easy to build. And one short enough to avoid all of the State's boating fees and registration shenanigans.
One of the most commonly built designs meeting those requirements is the Eastport Pram by Chesapeake Light Craft. A neat little stitch-and-glue rowboat / sailboat / motorboat that can be bought from them in a complete CNC cut kit. We could have just bought the kits and immediately started building, but we wanted to cut the parts ourselves. Plus, I knew the design was going to be modified (it's just what I do). So the Eastport Pram simply became our inspiration.
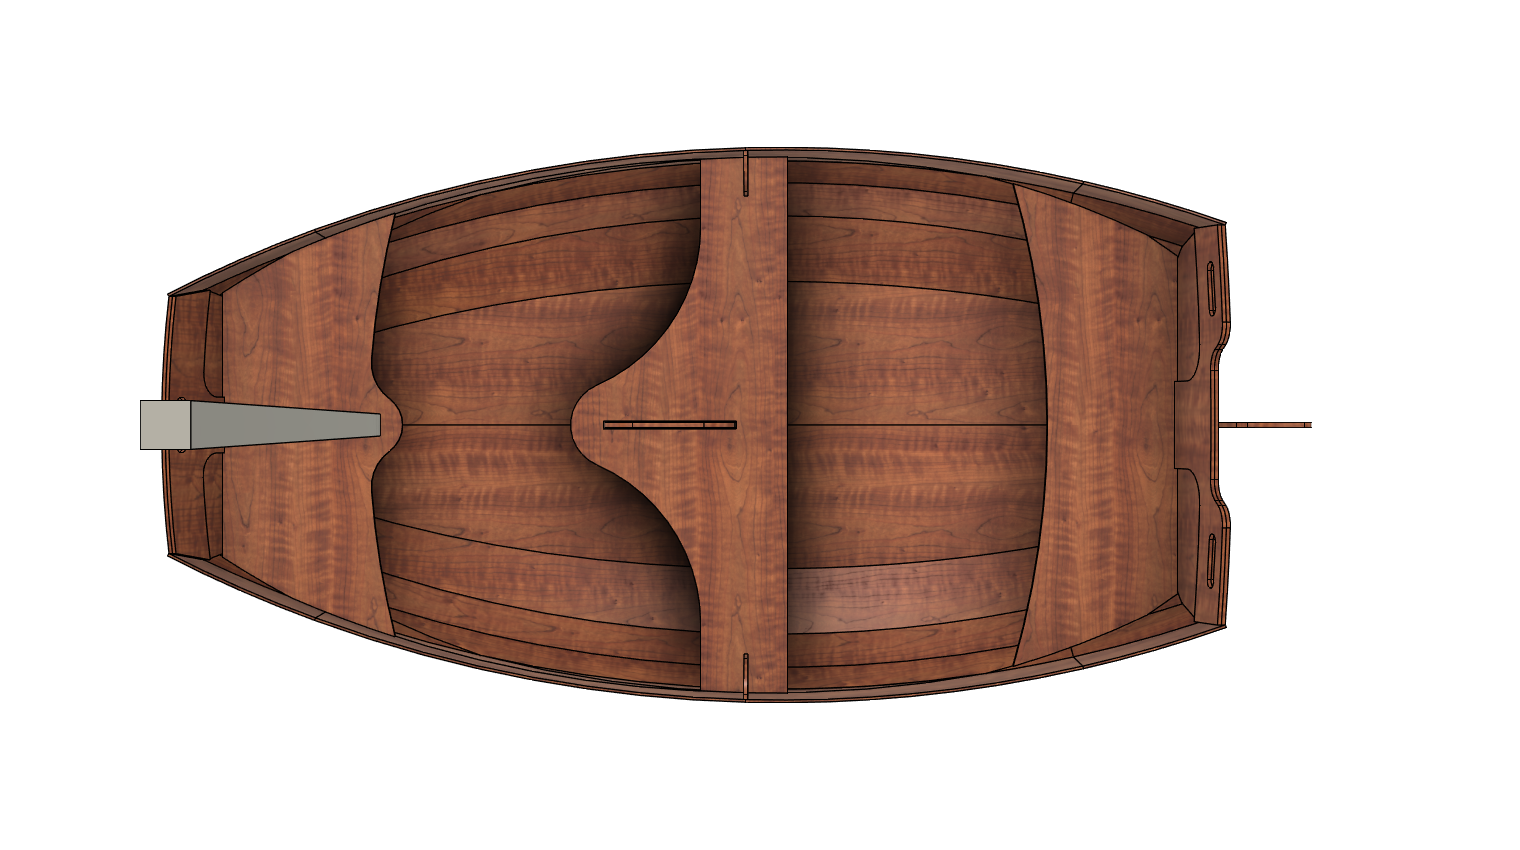
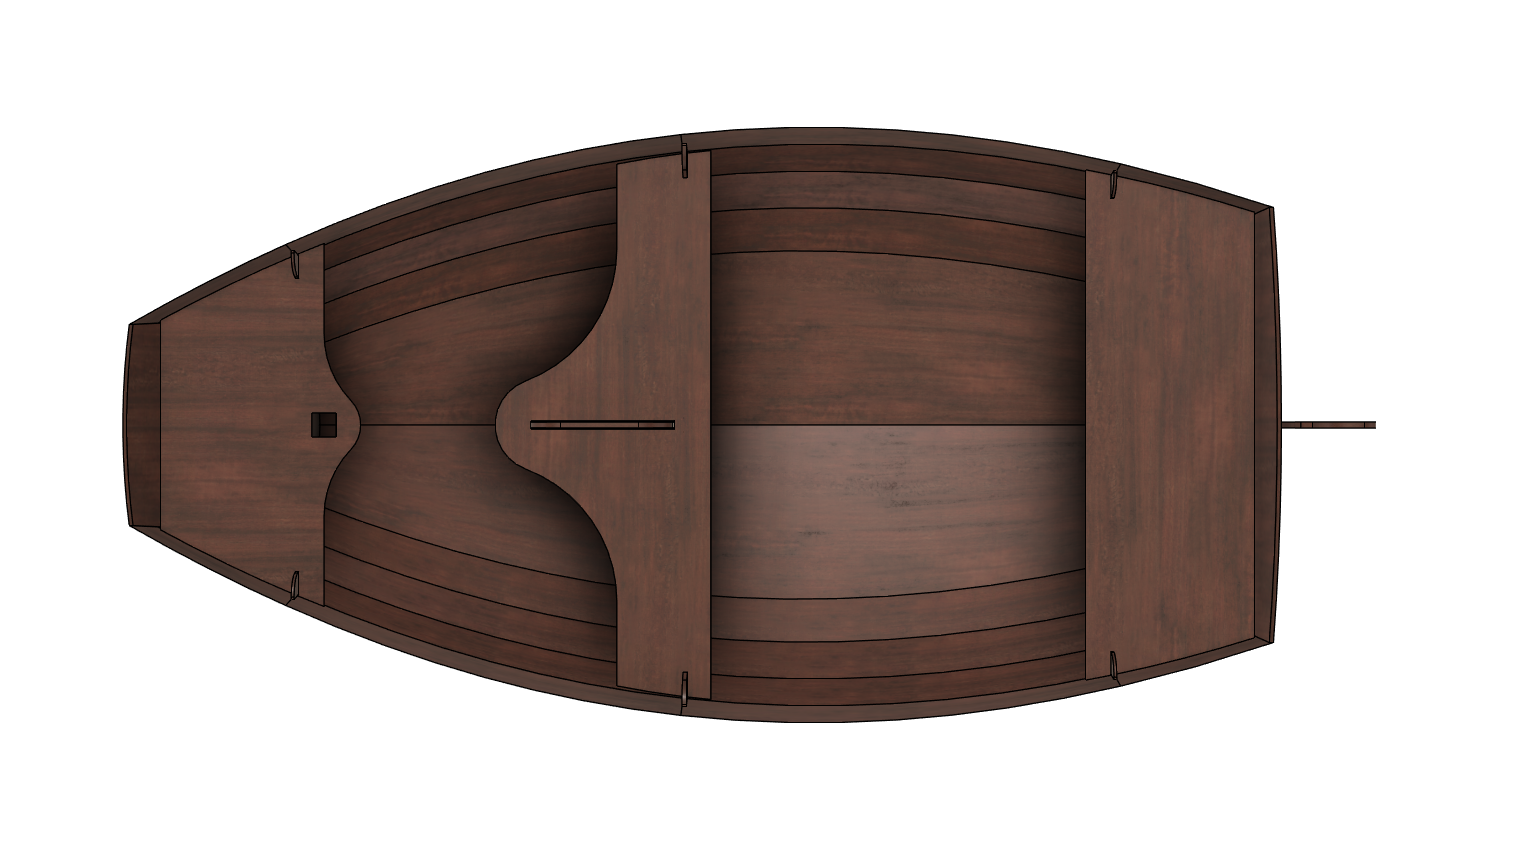
In an effort to practice designing a boat, I designed one using similar lines to the Eastport Pram. I made wild-ass guesses about the dimensions and details. It seems pretty close. This was done just to get my bearings about a design of this type. There is no intention to provide this design to anyone, please do not ask.
After a couple of days at the coffee shop working quietly in a corner, this is what I ended up with:
Designing the Northwest Pram
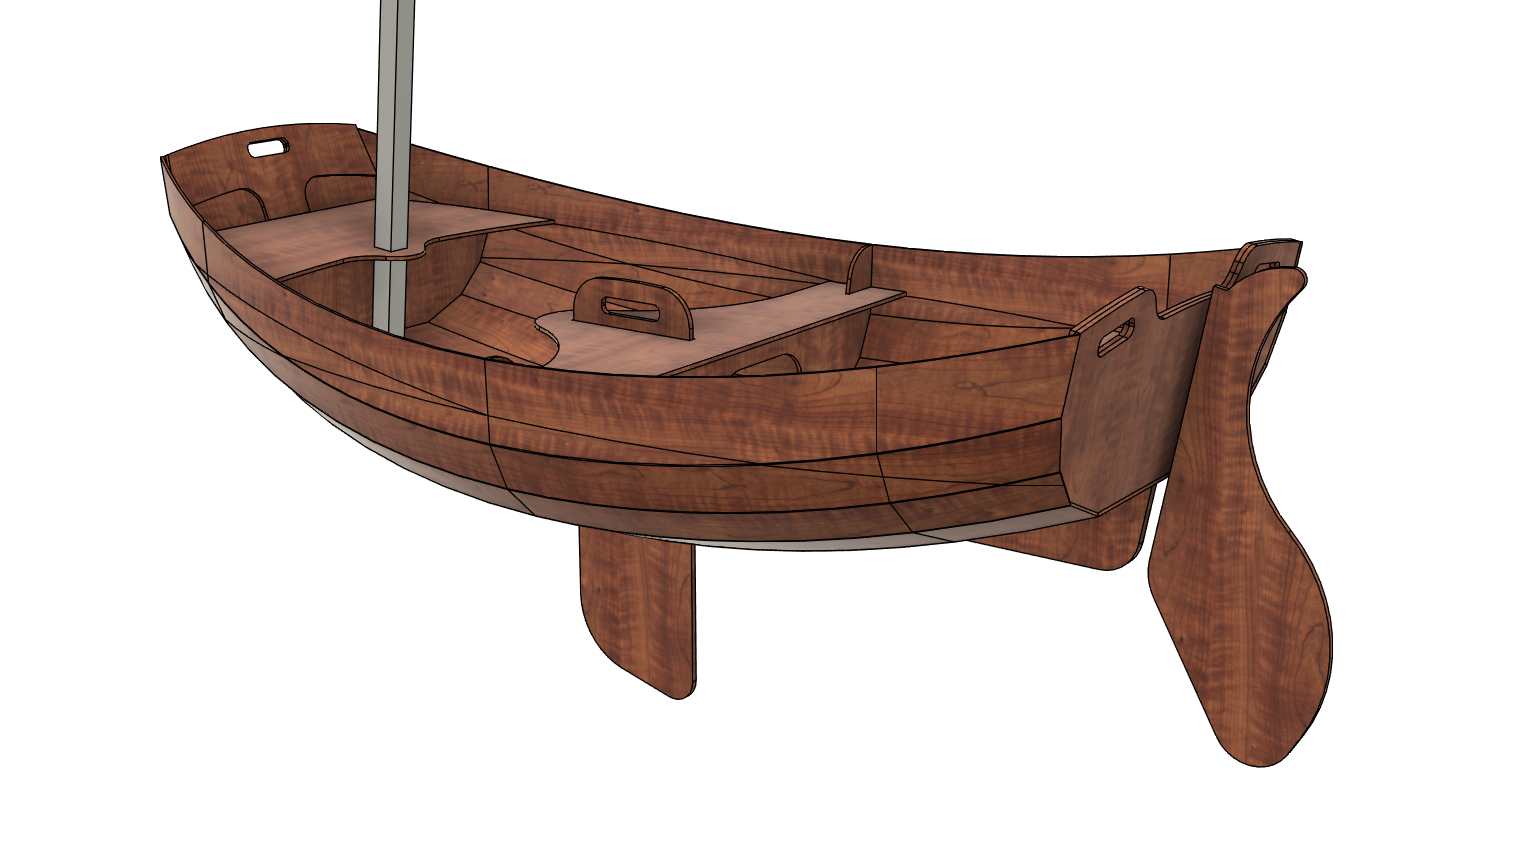
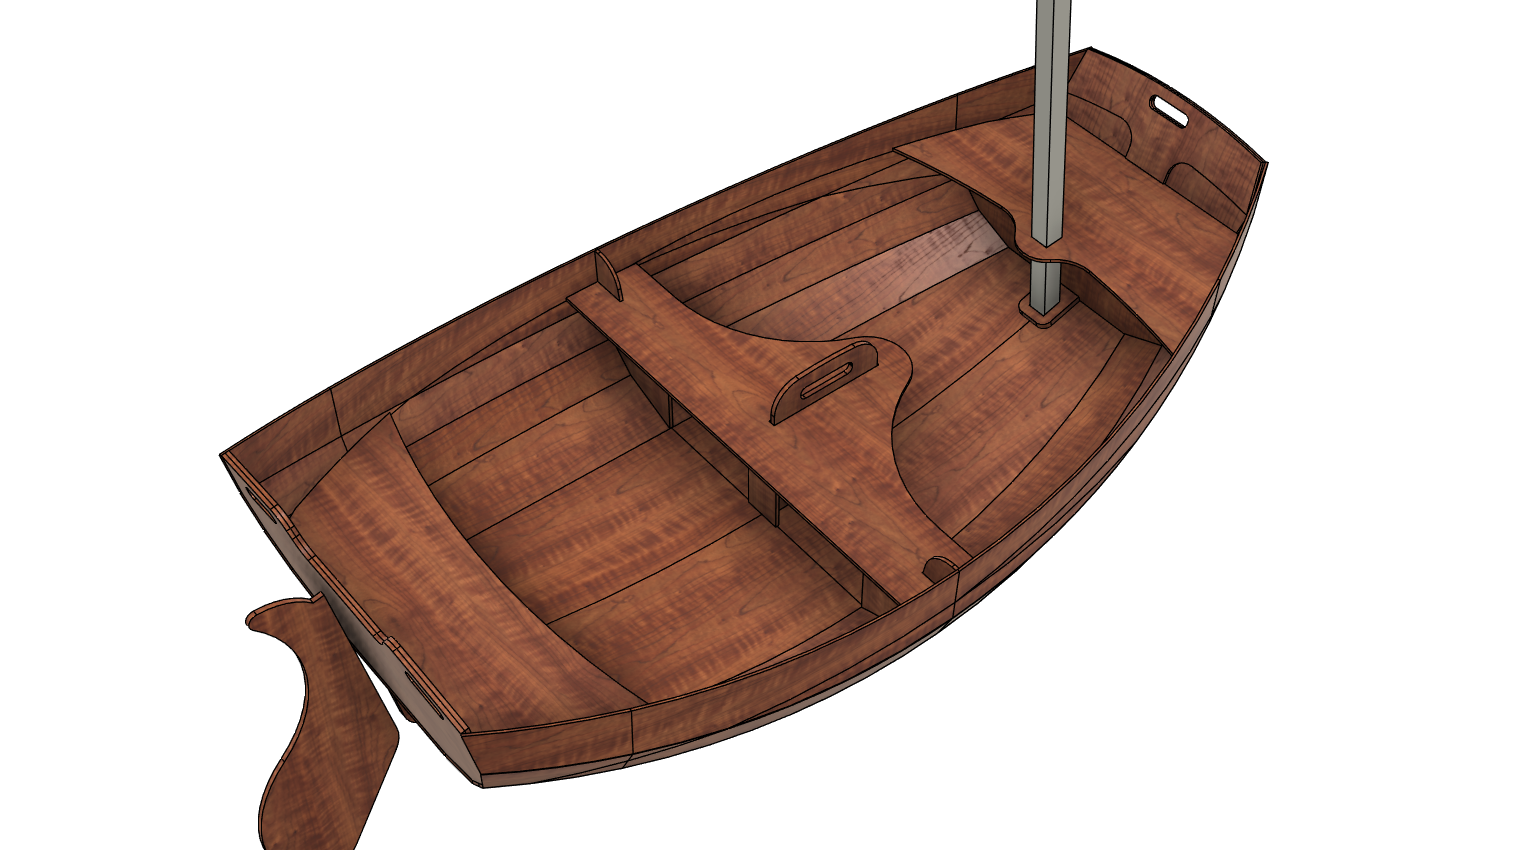
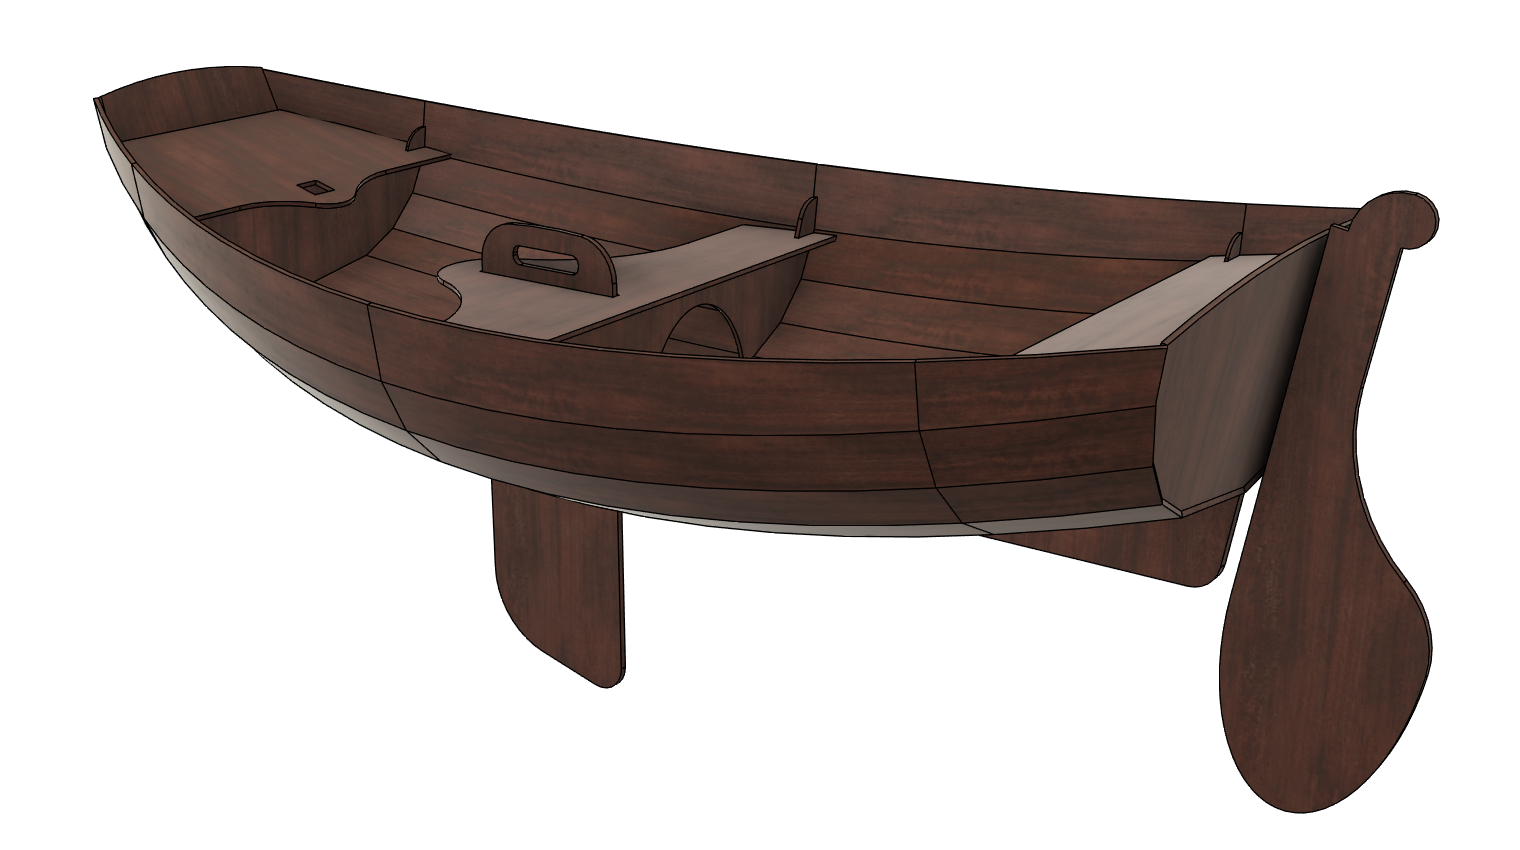
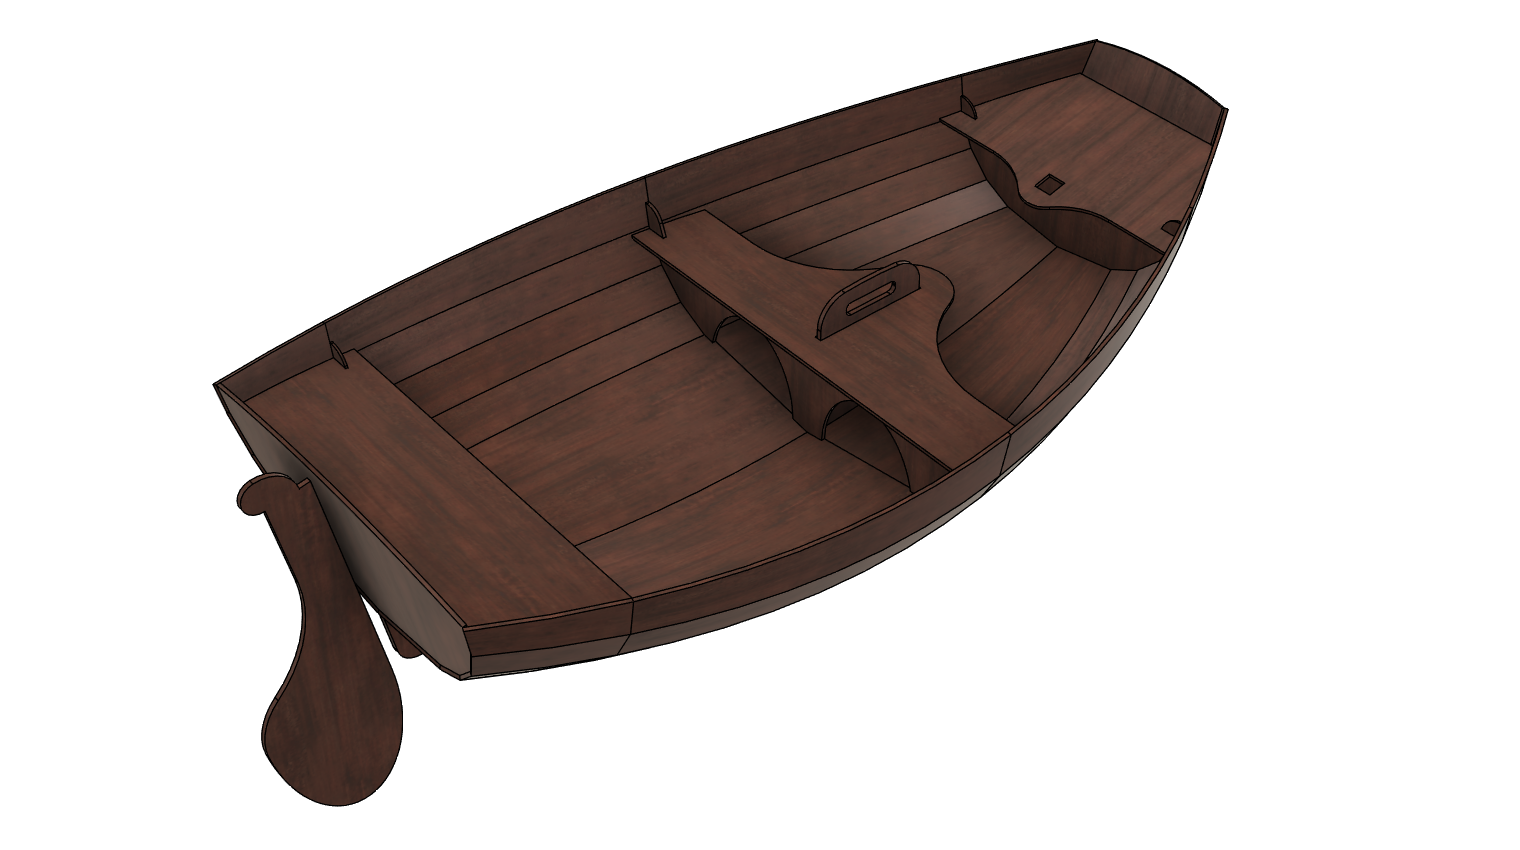
The Eastport Pram seems like a great all-arounder: It is a rowboat, it is a sailboat, even a motorboat, and either for one or two persons. However, we knew we only needed to sail our boats and with only one person aboard. Design is a series of compromises. By making a boat focused on one-up sailing, you can remove the compromises necessary for the stability and space required for two-up rowing.
Starting from scratch, I designed a boat that:
-
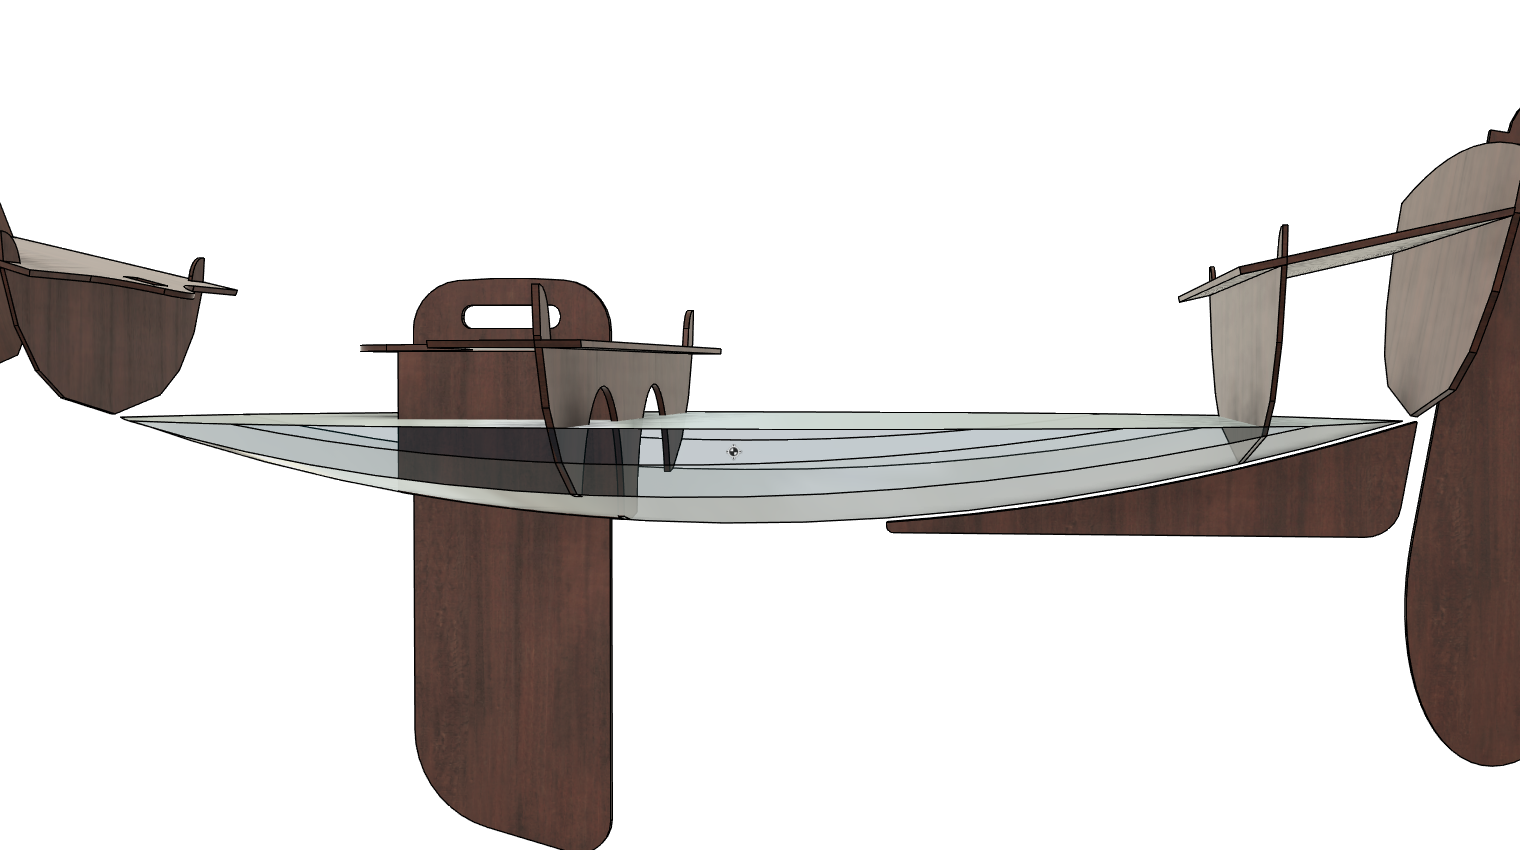
Has a slim water displacement shape. Wider = stable but Skinny = quicker. This was done by providing a V-bottom, making the front of the boat smaller, moving the sailor forward, and shaping the aft so that the water displacement would taper gradually.
-
Positions the sailor centrally on the floor. To accommodate one-up and two-up rowing, the forward and center twarts (seats) usually are larger and take up more space. This puts the weight of the sailing position off-center to the rear which is, depending on the shape of the hull, possibly not optimal.
-
Is optimized for Design for Manufacturing (DFM). Not only was there a focus on making a nicely shaped boat, there was a focus on using the most efficient layouts on the least amount of plywood sheets.
This design is a bit less stable, and because the whole front of the boat got smaller there is really no room up front for anything but a cooler, or dog, or maybe a kid. But it should be a quick and efficient shape. And, all of the parts can just barely fit onto three sheets of plywood.
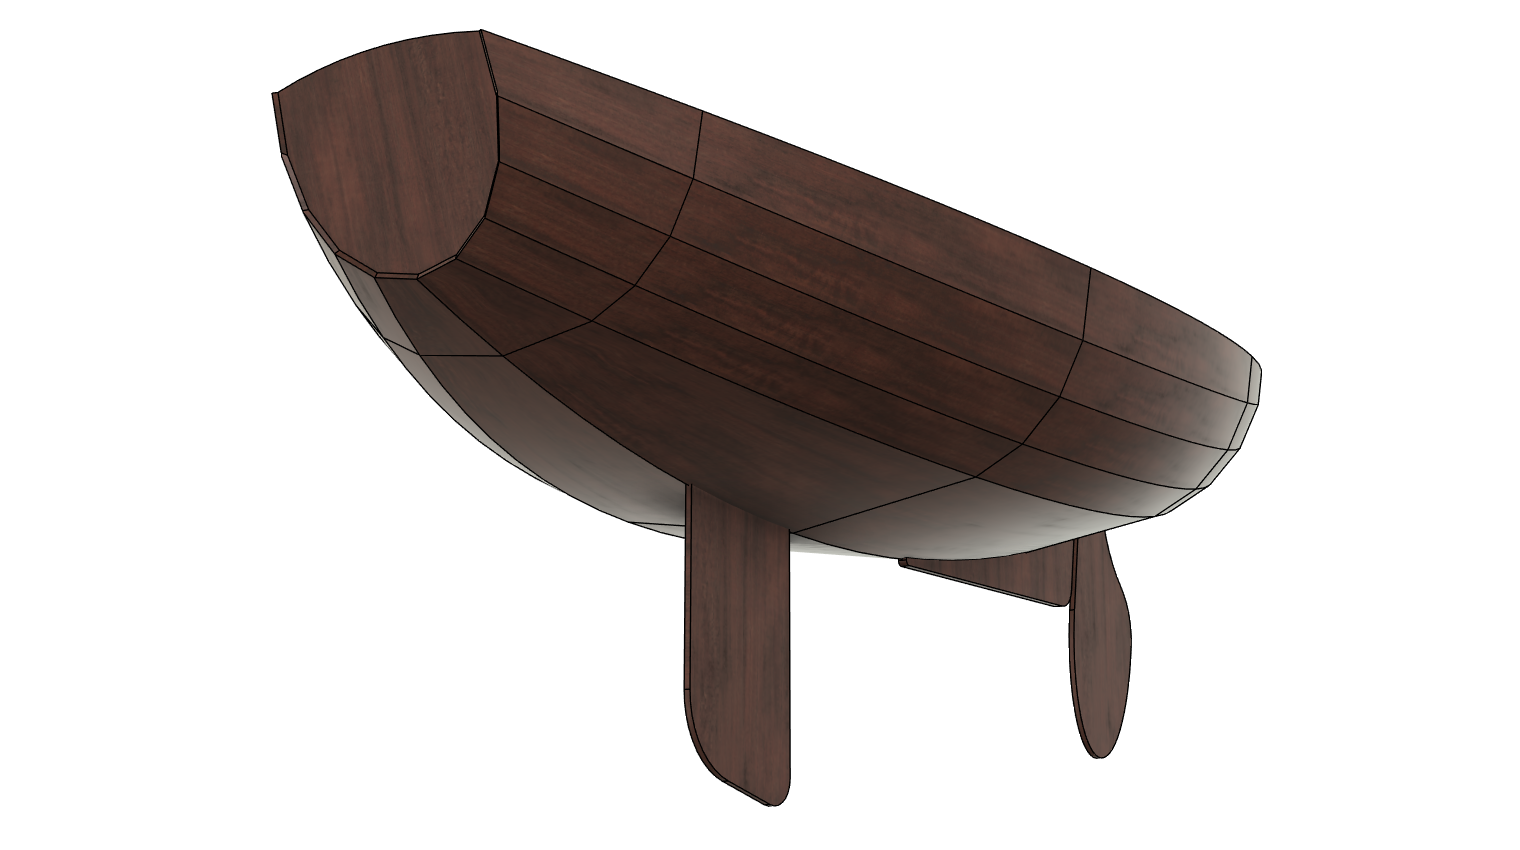
Here are images with showing the displaced water solid (the light blue shape) and its center of mass (the small dot). The center of mass of the displaced water is basically the center of lift of the hull (for lack of better words). This is where the center of mass of the boat and sailor need to be positioned for the hull to sit in the water level front to back.
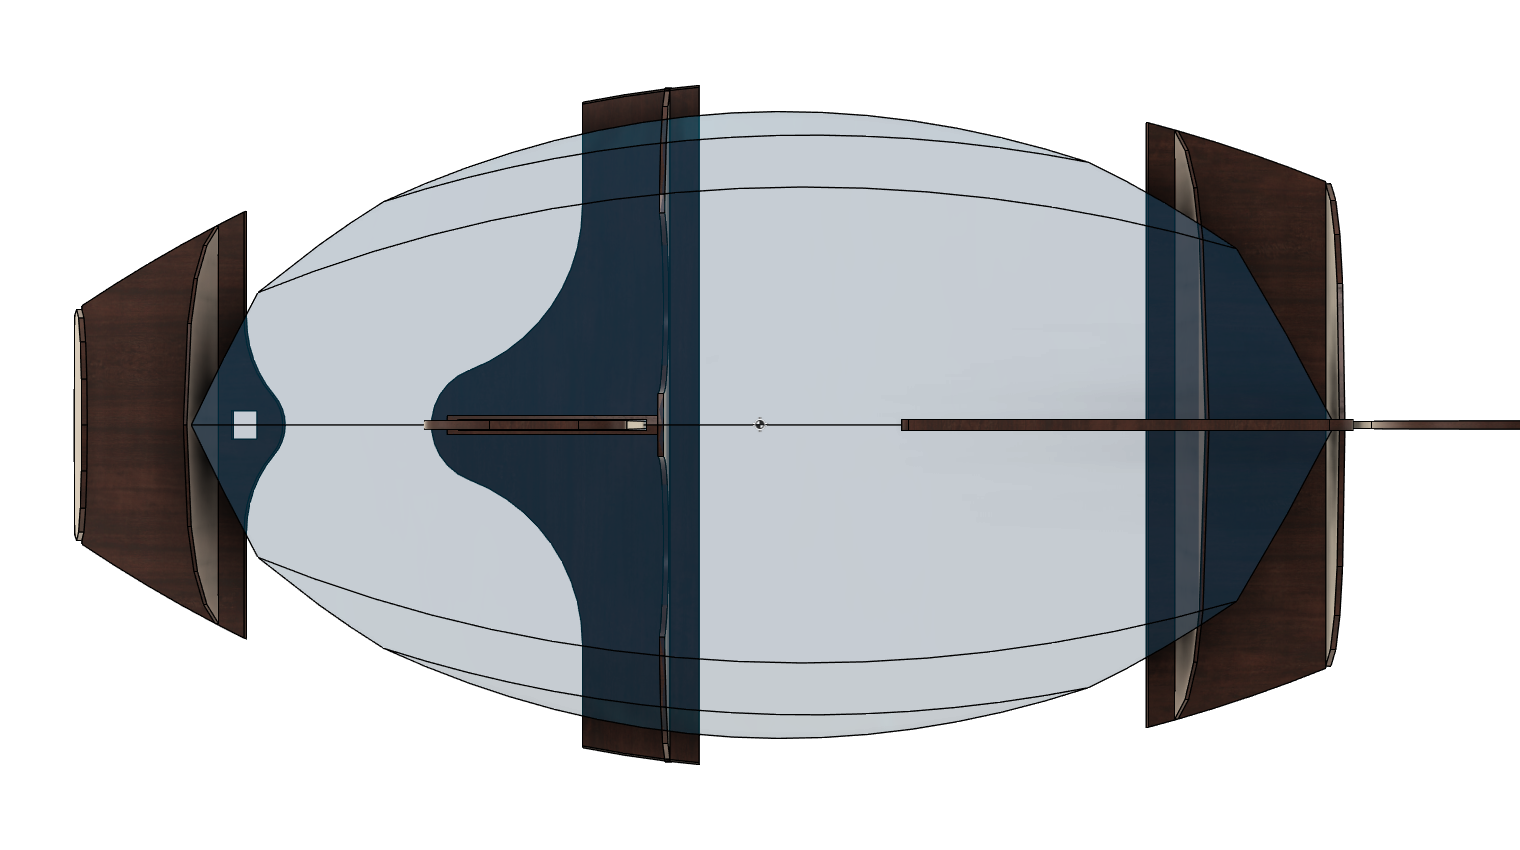
OK, sure, there will be a lot of other forces to contend with which change how the hull sits in the water. When underway, there will be the displaced force of the sail and the drag of the daggerboard (both causing torque which rotates the boat). This is where having floor space available for the sailor to shift as necessary is a consideration.
3D Designs to 2D Layouts
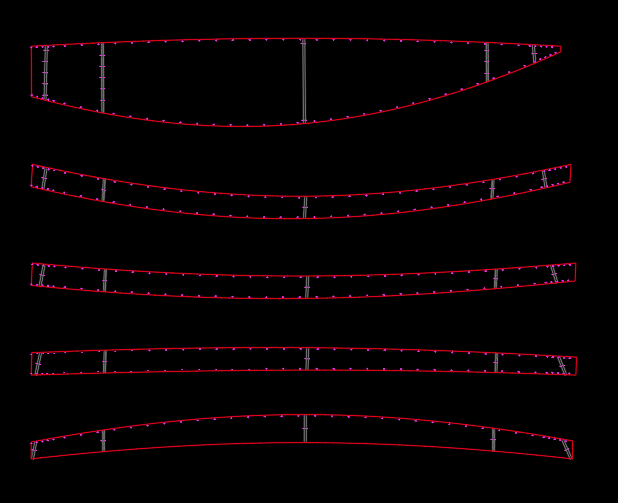
The 3D parametric solid modeling software I was using has the ability to generate CNC patterns and GCode cutting files, but it is a bit laborious. I find it easier to extract the flat patterns from the 3D software into DXF files, and then work with those files in 2D CAD. The following is an example of that work.
I first extract the flat projection of each solid part into separate DXF files. Those are imported onto a 2D drawing (it is as simple as export-to in one program, drag-and-drop in another):

Then, using those raw flat projections, I use CAD to:
-
Create any parts not otherwise drawn in the 3D model.
-
Position all of the holes necessary for stitch-and-glue.
-
Fine tune any small changes.
You end up with drawings which looks like this:
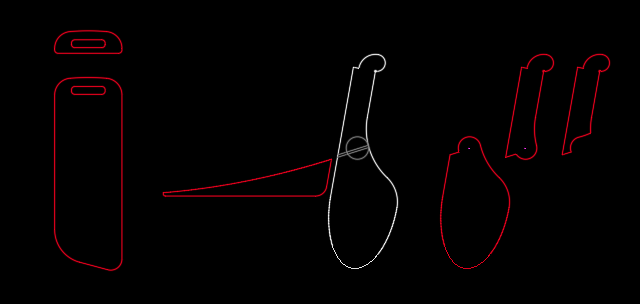
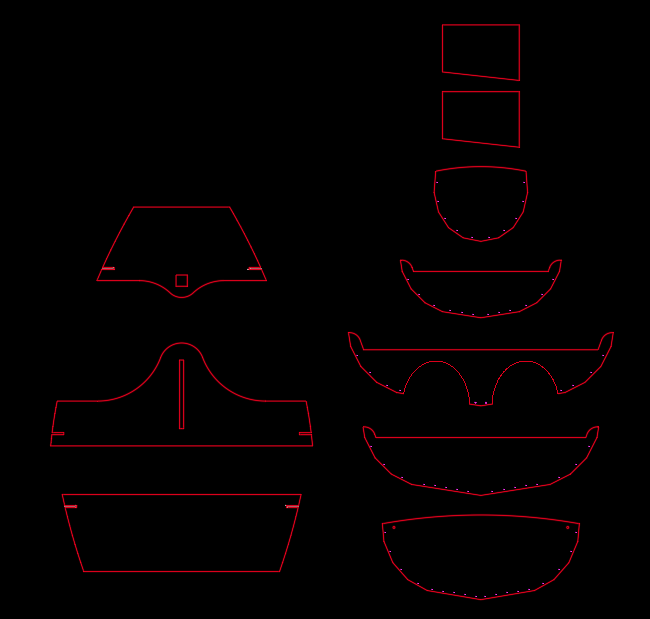
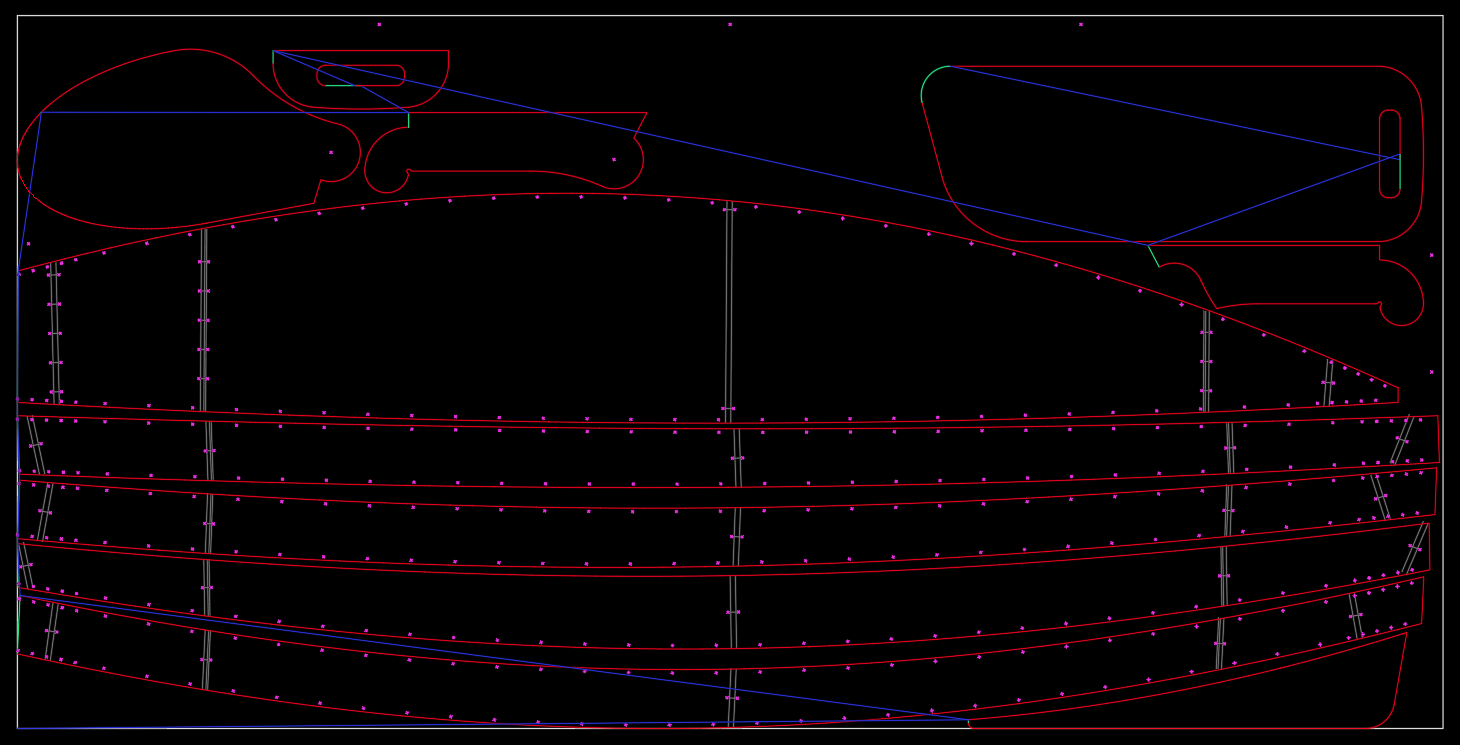
Taking those part files, I nest them onto plywood sheets. This is shown in the next image.
Incidentally, you can see how the length of the parts just barely fit onto the sheet of plywood. This was due to a couple of Design for Manufacturing steps. The boat was initially shorter, but when it was found that the plywood could accommodate a bit more, the length of boat was increased (a good thing).
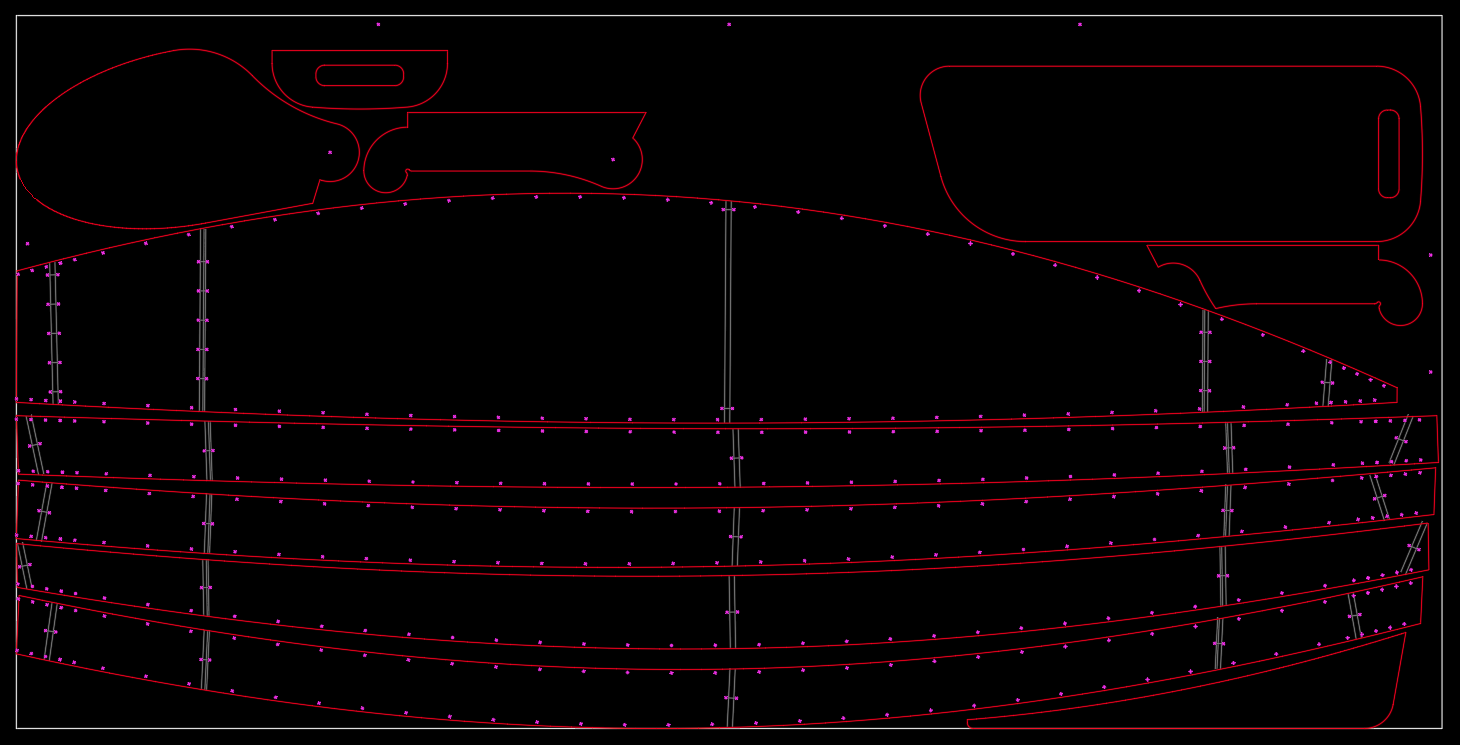
The following shows the drawing file with the additional information necessary for the CAM software DXFtoGCode. This is free CAM software available on this site! You can find it here: DXFtoGCode
Download the Plans for the Northwest Pram
If you want the DXF file for the Northwest Pram, you can download it here:
You should get a single DXF drawing file which has the layouts described in the above section. If you have a CNC router and would like to create GCodes using DXFtoGCode, you will need to:
-
Copy and paste the two final layouts into new DXF files. One separate DXF file for each layout.
-
Position the lower left corner of the white outline at the drawing origin (0,0). By the way, the white outline represents a sheet of 4 x 8 foot plywood.
-
Save each file to the working directory of DXFtoGCode.
-
Run DXFtoGCode for each file. Done!
If you do not have a CNC router... Well, why not?! Otherwise, go find someone that does. Gesh.
Building
2024
We are working on the boats, and I am still working on this page. Please keep checking in.